Fixing Roofing Shingles: Complete Guide to Shingle Repair and Replacement
That missing shingle staring back at you from the roof is not just an eyesore. Left unaddressed, it becomes a welcome mat for water, mold, and repair bills that grow faster than weeds in July. The good news? Fixing roofing shingles is one of the most manageable roof repairs when you know what you are doing. This guide covers everything from spotting damage to completing repairs that last, whether you tackle the work yourself or call in roofing repair specialists.
Understanding Roofing Shingle Damage
Before grabbing a ladder, take time to understand what you are dealing with. Shingle damage comes in many forms, and each type requires a different approach. Recognizing the specific problem helps you choose the right repair method and materials.
Wind damage typically lifts shingle edges or tears shingles completely off the roof. Hail creates circular bruises that weaken the protective granule layer. Age causes curling, cracking, and brittleness. Improper installation leads to premature failure in predictable patterns. Each problem leaves distinct visual clues that experienced trusted roofing contractors recognize immediately.
Common Types of Shingle Damage
Knowing what type of damage you face determines whether fixing roofing shingles makes sense or if replacement is the smarter choice. Here are the most common issues homeowners encounter:
Cracked Shingles
Temperature swings cause shingles to expand and contract repeatedly. Over time, this thermal cycling creates cracks that allow water infiltration. Cracked shingles often appear in groups since they age together. Minor cracks can be sealed, but extensive cracking usually means the shingles have reached the end of their useful life.
Curling Shingles
Shingles curl in two ways. Cupping happens when edges turn upward while the center stays flat. Clawing occurs when edges stay flat while the center rises. Both conditions expose the underlying materials to weather. Curling results from age, poor ventilation, or manufacturing defects. Severely curled shingles need replacement rather than repair.
Missing Shingles
High winds love to rip shingles right off the roof, especially older ones with weakened nail seals. A missing shingle creates an obvious hole in your roof defense. Water follows the path of least resistance, and that exposed underlayment or decking becomes a direct route into your attic. Missing shingles require immediate attention.
Granule Loss
Those tiny colored pebbles on asphalt shingles protect against UV rays and weather. Granule loss accelerates aging and reduces shingle life. Check your gutters after rainstorms. Excessive granules in the downspout indicate aging shingles that may soon need replacement. Localized granule loss from hail damage benefits from asphalt roof repair techniques.
Blistering
Blisters form when moisture trapped in the shingle expands during hot weather. Small, unopened blisters rarely cause problems. Broken blisters expose the underlying layers to weather and should be repaired promptly. Manufacturing defects or poor attic ventilation typically cause blistering.
Tools and Materials for Fixing Roofing Shingles
Professional results require proper equipment. Roofing repair specialists arrive with everything needed because trips up and down the ladder waste time and energy. If you plan to tackle repairs yourself, gather these items before climbing up:
- Flat pry bar or shingle ripper for nail removal
- Hammer or roofing nailer for securing new shingles
- Roofing nails (galvanized, 1.25 inches for most applications)
- Replacement shingles matching existing roof
- Roofing cement or sealant for edges and nail heads
- Caulk gun for applying sealant
- Utility knife with extra blades
- Chalk line for alignment
- Safety harness and roof anchors
- Non-slip footwear

Step-by-Step Guide to Fixing Roofing Shingles
Whether you are replacing a single damaged shingle or repairing a section, following proper techniques ensures lasting results. Here is how professional roofers approach shingle repairs:
Step 1: Safety First
Roof work kills people every year. Never skip safety precautions. Use a sturdy extension ladder positioned at the correct angle (one foot out for every four feet up). Wear shoes with good traction. Work only in dry conditions. Consider a safety harness for steep pitches. If the roof feels unsafe, call roofing repair specialists instead. No repair is worth a trip to the emergency room.
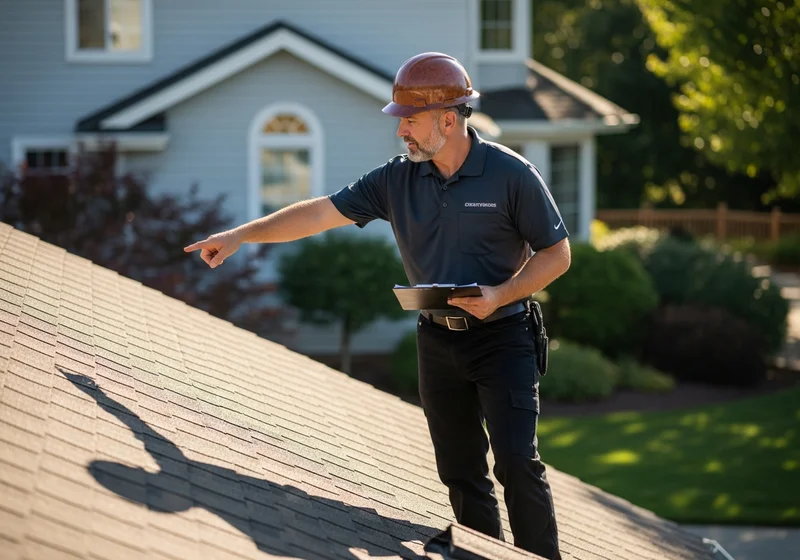
Step 2: Locate All Damage
One visible problem often hides others. Inspect the entire roof section while you have safe access. Look for lifted edges, missing granules, cracks, and nail pops. Check flashing around vents and chimneys since roof flashing repair often accompanies shingle work. Document everything before starting repairs.
Step 3: Break the Seal
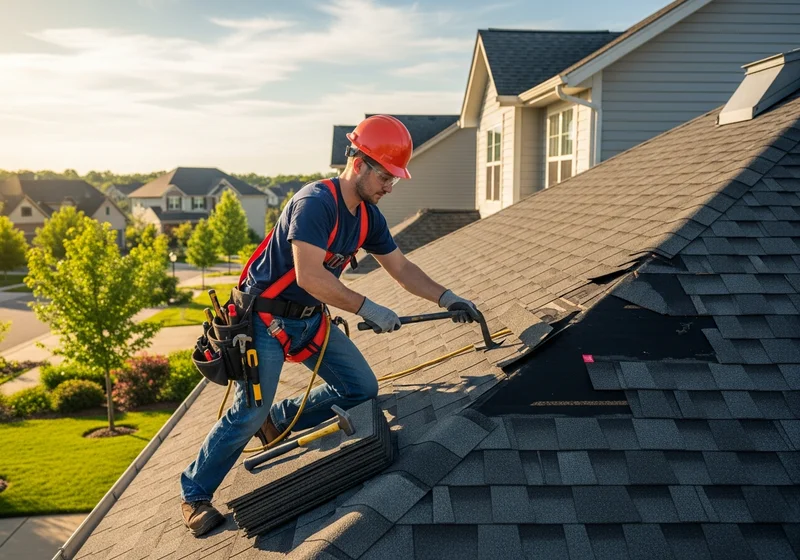
Shingles bond to each other through adhesive strips that soften in warm weather. To remove a damaged shingle, slide a flat pry bar under the shingle above and gently break the seal. Work carefully to avoid damaging surrounding shingles. Cool mornings make this step easier since adhesive is less sticky.
Step 4: Remove Nails
Each shingle has two rows of nails holding it down: one row through the shingle itself and another row through the shingle above. Locate all nails by lifting overlapping shingles. Slide the pry bar under each nail head and pop it out. Count the nails you remove so you replace them all.
Step 5: Remove the Damaged Shingle
Once nails are out, slide the damaged shingle free. Inspect the exposed underlayment and decking for water damage. Soft, discolored, or rotted decking requires additional repair before installing new shingles. This hidden damage explains why fixing roofing shingles sometimes costs more than expected.
Step 6: Prepare the Replacement
If the new shingle needs trimming to fit, cut from the back side using a utility knife and straightedge. Matching existing shingles exactly matters for appearance. Shingles from the same manufacturer in the same color can still look different due to age and weathering. Salvaging shingles from an inconspicuous spot sometimes provides a better match.
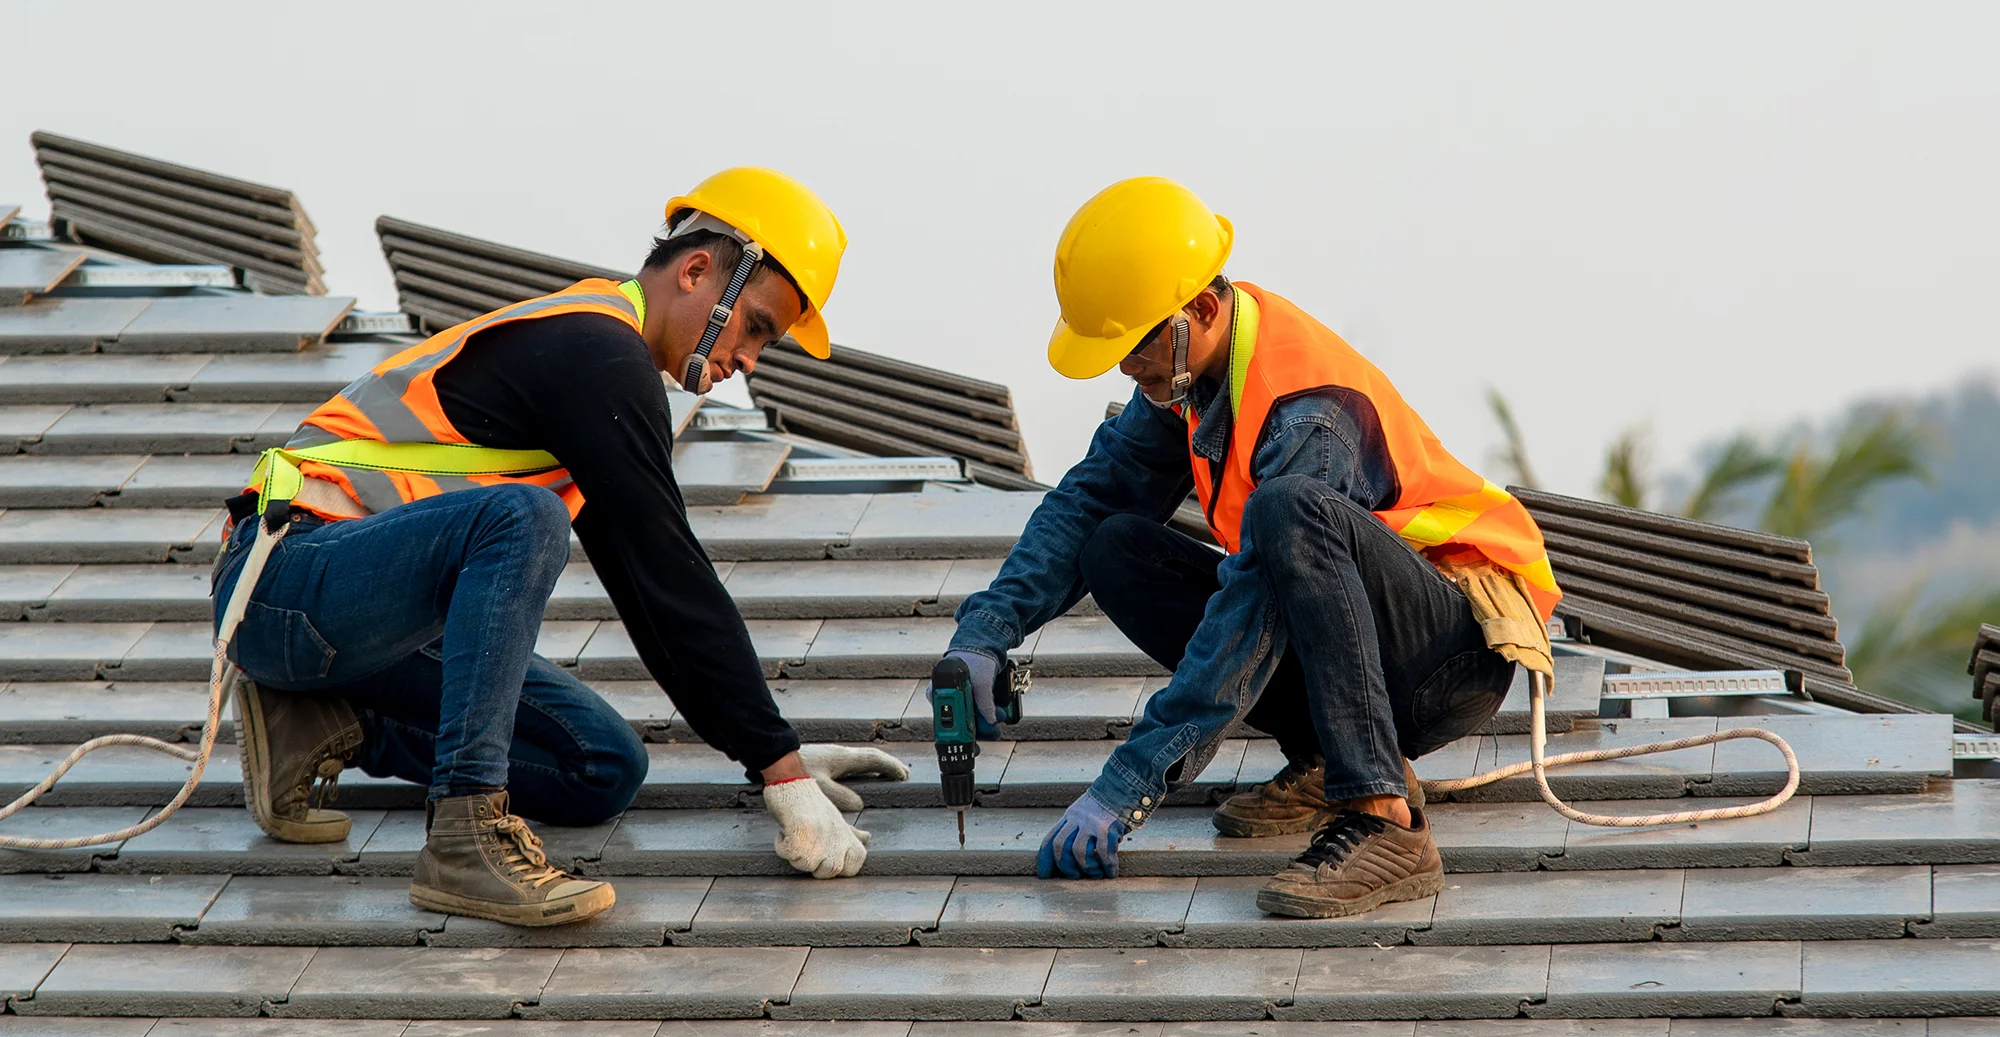
Step 7: Install the New Shingle
Slide the replacement shingle into position under the shingle above. Align it carefully with surrounding shingles to maintain the pattern. Lift the overlapping shingle and nail the new one in place using the same nail locations as the original. Most shingles require four to six nails depending on local wind requirements.
Step 8: Seal and Secure
Apply roofing cement under the edges of overlapping shingles to recreate the seal you broke earlier. Dab cement on exposed nail heads for extra protection. Press shingles firmly together. Warm weather helps adhesive strips bond naturally over the following weeks.
When to Call Roofing Repair Specialists
Some situations exceed the scope of DIY repairs. Recognizing these scenarios saves time, money, and frustration. Call a trusted roofing contractor when you encounter:
- Damage covering more than 25% of the roof surface
- Multiple layers of existing shingles
- Steep pitches exceeding 6:12 slope
- Damaged or rotted roof decking
- Problems around chimneys, skylights, or dormers
- Evidence of active leaks or water damage
- Shingles over 20 years old
- Warranty concerns (DIY repairs often void coverage)
Professional roofing repair specialists complete work faster, safer, and with better materials than most homeowners can access. Their experience spotting hidden problems prevents small repairs from becoming major projects.
Asphalt Roof Repair Best Practices
Asphalt shingles dominate the residential roofing market for good reason. They offer excellent value, wide color selection, and proven durability. Mastering asphalt roof repair techniques helps homeowners and contractors alike maintain these popular roofs effectively.
Match Materials Carefully
Shingle manufacturers change formulations and colors over time. A shingle purchased today may not match one installed five years ago even with the same product name. Save leftover shingles from the original installation for future repairs. Store them flat in a dry location away from direct sunlight.
Respect Temperature Limits
Asphalt shingles become brittle in cold weather and overly soft in extreme heat. Ideal repair temperatures range from 45 to 85 degrees Fahrenheit. Cold shingles crack during handling. Hot shingles scuff easily under foot traffic. Schedule asphalt roof repair work during moderate weather whenever possible.
Mind the Nail Pattern
Shingle manufacturers specify nail placement in their installation instructions. Nailing too high reduces wind resistance. Nailing too low can penetrate the shingle below. Following the nail line marked on each shingle ensures proper performance and maintains warranty coverage.
Seal Properly
Factory adhesive strips eventually bond shingles together, but fresh repairs benefit from additional sealant. Apply roofing cement sparingly. Excessive sealant can cause blistering. A thin bead under lifted edges and a dab on nail heads provides adequate protection without overdoing it.
Regional Considerations for Shingle Repairs
Climate impacts how shingles perform and fail. Understanding regional factors helps homeowners across the country make better repair decisions.
Northern Virginia Weather Challenges
Reston and the surrounding Northern Virginia area experience hot, humid summers and cold winters with occasional ice storms. This combination stresses shingles through thermal cycling, UV exposure, and freeze-thaw damage. Local roofing contractors near me understand these specific challenges and recommend appropriate materials.
Cold Climate Considerations
Homeowners in areas like Rochester face heavy snow loads and prolonged freezing temperatures. Ice dams form when heat escaping through the roof melts snow that refreezes at the eaves. Proper ventilation and ice-and-water shield installation prevent damage. Roofing contractors in Rochester and similar climates emphasize these protective measures.
Midwest Weather Patterns
Regions like Columbus experience severe thunderstorms, hail, and tornadoes. Columbus roof repairs often follow storm damage, making quick response from qualified contractors essential. Impact-resistant shingles provide better protection in hail-prone areas, though they cost more upfront.
Humid Climate Factors
High humidity promotes algae and moss growth on shingles. These organisms hold moisture against the roof surface and accelerate deterioration. Algae-resistant shingles and periodic cleaning help maintain appearance and longevity in humid regions.
Cost Factors for Fixing Roofing Shingles
Understanding what drives repair costs helps you budget appropriately and evaluate contractor quotes. Several factors influence the final price:
- Extent of damage: More damaged shingles mean more materials and labor
- Roof accessibility: Steep pitches and multi-story homes cost more
- Shingle type: Architectural shingles cost more than three-tab
- Hidden damage: Rotted decking or damaged underlayment adds cost
- Local labor rates: Urban areas typically cost more than rural
- Permit requirements: Some jurisdictions require permits for roof work
- Minimum service charges: Small repairs may carry minimum fees
Get written quotes from at least three roofing repair specialists before committing. Compare scope of work, not just price. The cheapest quote often excludes important details.
Preventing Future Shingle Damage
The best repair is the one you never need. Proactive maintenance extends shingle life and reduces emergency repair calls. Implement these preventive measures:
Regular Inspections
Inspect your roof twice yearly, ideally in spring and fall. Look for lifted shingles, missing granules, debris accumulation, and flashing problems. Binoculars work well for ground-level inspections. Document what you find and address small problems before they grow.
Keep Gutters Clean
Clogged gutters cause water to back up under shingles at the eaves. This accelerates rotting and ice dam formation. Clean gutters at least twice yearly and after major storms. Consider gutter guards to reduce maintenance frequency.
Trim Overhanging Branches
Tree limbs rubbing against shingles scrape away protective granules. Falling branches cause impact damage. Shade from dense tree cover promotes moss growth. Maintain at least six feet of clearance between branches and your roof.
Ensure Proper Ventilation
Adequate attic ventilation prevents heat buildup that accelerates shingle aging. It also reduces moisture that causes decking rot and mold growth. Check that soffit vents remain unblocked and ridge or roof vents function properly.
Address Small Problems Quickly
A lifted shingle today becomes a leak next month. Small repairs cost far less than water damage remediation. Fix problems when you spot them rather than waiting for a convenient time that never comes.
Choosing a Trusted Roofing Contractor
When repairs exceed your comfort level, finding the right contractor matters. A trusted roofing contractor provides peace of mind and lasting results. Look for these qualities:
Proper Licensing and Insurance
Verify current state or local licenses before hiring. Confirm liability and workers compensation insurance coverage. These credentials protect you from liability if something goes wrong. Legitimate contractors provide proof willingly.
Local Reputation
Established local contractors have reputations to protect. They depend on referrals and repeat business. Check online reviews, ask for references, and verify completed projects in your area. A contractor doing quality work in Northern Virginia builds a track record over time.
Written Estimates and Contracts
Professional contractors provide detailed written estimates specifying materials, scope of work, timeline, and payment terms. Never accept verbal agreements for roofing work. Written documentation protects both parties and prevents misunderstandings.
Warranty Coverage
Quality contractors stand behind their work with written warranties. Understand what the warranty covers, how long it lasts, and what conditions void coverage. Manufacturer warranties on materials often require professional installation to remain valid.
Clear Communication
Good contractors explain the work, answer questions, and keep you informed throughout the project. They arrive when promised and complete work on schedule. Communication problems during the estimate phase usually get worse once work begins.
Emergency Shingle Repairs
Storm damage does not wait for convenient scheduling. When shingles disappear in the night or a branch punches through your roof, quick action prevents further damage.
Temporary Protection
If you cannot get immediate professional help, temporary measures limit water intrusion. Plastic sheeting or tarps secured with boards provide short-term protection. Roofing cement can seal small holes temporarily. These fixes buy time but do not replace proper repairs.
Document Everything
Before touching anything, photograph the damage from multiple angles. This documentation supports insurance claims and helps contractors understand the scope of work. Date-stamped photos prove the damage occurred during a specific event.
Contact Your Insurance Company
Report damage to your insurer promptly. Most policies require timely notification. Understand your coverage limits, deductible, and claim process before accepting repair quotes. Some contractors assist with insurance claims as part of their service.
Avoid Storm Chasers
After major storms, out-of-town contractors appear offering quick repairs. Many lack proper licensing, use substandard materials, and disappear when problems arise. Stick with established local contractors who will be around to honor warranties and handle any issues.
Long-Term Shingle Maintenance
Fixing roofing shingles addresses immediate problems, but ongoing maintenance maximizes your roof investment. Think of maintenance as insurance for the repairs you just completed.
Annual Professional Inspections
Even if you inspect your own roof, periodic professional evaluations catch problems you might miss. Experienced inspectors recognize subtle warning signs that indicate developing issues. Annual inspections cost little compared to the repairs they prevent.
Moss and Algae Treatment
If moss or algae appear, address them before they damage shingles. Zinc or copper strips installed near the ridge release algae-inhibiting ions during rainstorms. Chemical treatments remove existing growth. Never pressure wash asphalt shingles as this destroys the protective granule layer.
Flashing Maintenance
Flashing around chimneys, vents, and wall intersections requires periodic attention. Sealant deteriorates over time. Metal expands and contracts with temperature changes. Include flashing inspection with every roof checkup and address problems promptly.
Attic Checks
Periodically inspect your attic for signs of roof problems. Water stains, daylight through the decking, and moisture on rafters indicate issues requiring immediate attention. Catching leaks from inside often reveals problems before they become visible outside.
Ready to Fix Your Shingles?
Whether you tackle repairs yourself or call professionals, understanding shingle repair helps you make informed decisions. Small repairs done right prevent major problems. Professional help makes sense when damage exceeds comfortable DIY scope.
Reston Roofing serves Northern Virginia homeowners with expert roof repair services delivered by experienced professionals. Our team provides thorough inspections, honest recommendations, and quality repairs that last. We use premium materials and proven techniques developed through years of local experience.
Contact us for a free inspection and estimate. We will assess your shingle condition, explain your options, and provide written pricing before any work begins. Your roof protects everything you value. Trust it to professionals who understand what proper repair requires.
Get Expert Help With Your Shingle Repairs
Our experienced team provides free inspections and honest recommendations for all your roofing needs. Contact Reston Roofing today.
Schedule Free InspectionFrequently Asked Questions
How much does it cost to fix roofing shingles?
Fixing roofing shingles typically costs $150 to $400 for minor repairs involving a few shingles. Larger repairs covering 100 square feet or more can range from $400 to $1,000. The cost varies based on shingle type, roof pitch, and accessibility. Getting quotes from roofing repair specialists ensures accurate pricing for your specific situation.
Can I fix roofing shingles myself?
Minor shingle repairs like securing a single lifted shingle can be done by experienced homeowners with proper safety equipment. However, most repairs benefit from professional expertise. Roofing repair specialists identify hidden damage, use correct techniques, and maintain warranty coverage that DIY repairs often void.
How long do repaired shingles last?
Properly repaired asphalt shingles can last 10 to 20 additional years depending on the original shingle quality and repair method. Professional repairs using matching materials and correct installation techniques maximize longevity. Repairs done by a trusted roofing contractor typically outlast DIY fixes.
What causes shingles to need repair?
Common causes include wind damage, hail impact, age-related wear, improper installation, thermal expansion and contraction, and moisture damage. Northern Virginia weather with hot summers and freezing winters accelerates shingle deterioration, making regular inspections important for early problem detection.
Should I repair or replace damaged shingles?
Repair makes sense when damage affects less than 30% of the roof and the overall structure is sound. Replace when damage is widespread, the roof is over 20 years old, or you notice recurring problems in multiple areas. A trusted roofing contractor can assess your specific situation and recommend the best approach.