Roofing Flashing Installation: Best Practices to Prevent Leaks from Day One
Roofing flashing installation separates leak-free roofs from problematic systems plagued by water intrusion, structural damage, and costly repairs. This critical waterproofing component—thin metal or composite material installed at roof transitions, penetrations, and valleys—directs water away from vulnerable areas where different building elements meet. Despite representing just 5-10% of total roofing costs, proper flashing installation prevents 90% of roof leaks according to industry studies. Northern Virginia's climate featuring intense rainfall, ice dam formation, and severe weather makes expert flashing installation essential for long-term roof performance throughout Reston, Herndon, and surrounding communities.
Understanding Roof Flashing Fundamentals
Roof flashing creates watertight barriers at transitions where roofing materials alone cannot provide adequate protection. These vulnerable locations include roof valleys where two slopes meet, penetrations like chimneys and vent pipes, wall-roof intersections, skylights, and dormers. Without proper flashing, water infiltrates these gaps causing ceiling stains, insulation damage, structural rot, and mold growth. Quality flashing installation integrated properly with roofing materials channels water onto roof surfaces where shingles shed it effectively rather than allowing infiltration at weak points.
The term "flashing" encompasses various profiles, materials, and installation techniques depending on specific applications. However, all flashing shares common purpose—creating continuous, overlapping barriers directing water progressively downward and outward away from building interiors. Proper installation follows fundamental principle: upper flashing components always overlap lower ones, allowing gravity to move water away from structures rather than creating pathways for reverse water migration. Understanding these basic concepts helps homeowners recognize quality roofing installations versus shortcuts compromising long-term performance.
Types of Roof Flashing
Valley flashing protects roof valleys—internal angles where two roof planes intersect creating concentrated water flow channels. Open valley flashing uses visible metal—typically aluminum or copper—running valley length with shingles trimmed back exposing metal surface. Closed valleys hide flashing beneath overlapping shingles creating woven appearance. Woven valleys interlock shingles from both slopes without separate flashing—acceptable for low-pitch roofs but less reliable than metal valley flashing in heavy precipitation areas.
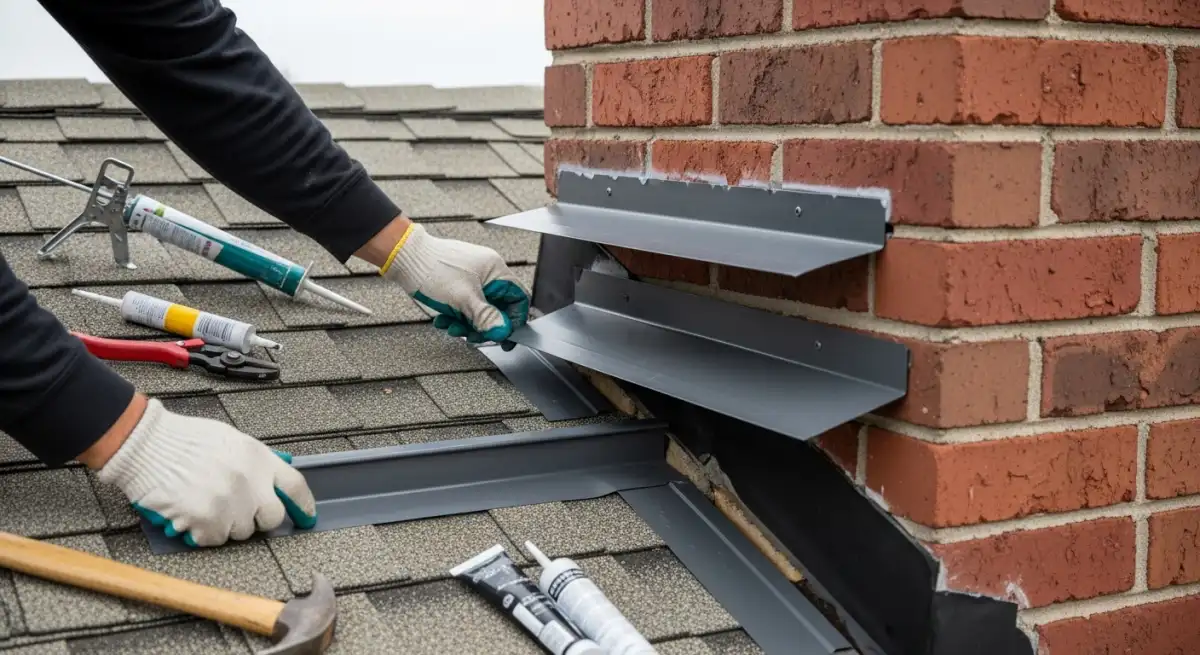
Step flashing protects wall-roof intersections where vertical surfaces meet sloped roofs. L-shaped metal pieces install in steps, alternating with shingle courses up roof slopes. Each piece overlaps the one below, creating continuous barrier as shingles progress upward. Counter flashing covers step flashing, embedding in wall siding or masonry preventing water infiltration behind step flashing. This layered approach provides redundant protection critical for leak prevention at these vulnerable transitions common on dormers, chimneys, and addition walls throughout Vienna and McLean properties.
Specialized Flashing Applications
Chimney flashing represents most complex flashing application requiring multiple integrated components. Base flashing lays foundation, step flashing protects side walls, and counter flashing embedded in mortar joints covers lower flashing preventing water infiltration. Cricket or saddle flashing diverts water around chimney upslope sides preventing debris accumulation and ice dam formation. This multi-component system demands skilled installation ensuring each element integrates properly with others while maintaining flexibility accommodating chimney settlement and thermal movement.
Pipe boot flashing seals roof penetrations from plumbing vents, exhaust pipes, and electrical conduits. Flexible rubber or lead boots conform to pipe contours while metal bases integrate with roofing materials. Skylight flashing incorporates metal components around skylight perimeters with integrated curbs or saddles preventing water infiltration. Drip edge flashing protects roof perimeters directing water into gutters while preventing capillary action drawing moisture under shingles. Each flashing type serves specific purpose requiring appropriate materials, profiles, and installation techniques ensuring reliable long-term performance.
Material Selection for Flashing Applications
Aluminum flashing dominates residential roofing due to favorable cost-performance characteristics. Aluminum resists corrosion, accepts paint matching roof or siding colors, remains lightweight facilitating installation, and costs $3-8 per linear foot installed depending on profile complexity. Mill finish aluminum works adequately though painted versions provide better aesthetics and additional corrosion protection. Aluminum suits most Northern Virginia applications offering 30-50 year lifespan matching typical roof service life.
Galvanized steel flashing offers superior strength and rigidity compared to aluminum but requires paint or coating preventing rust—particularly at cut edges where protective zinc layer breaches. Steel costs $2-6 per linear foot, slightly less than aluminum. However, steel's corrosion vulnerability in humid climates makes aluminum preferred choice for most residential applications. Steel remains popular for commercial roofing or situations demanding maximum strength resisting deformation during installation or service.
Premium Flashing Materials
Copper flashing delivers unmatched longevity and aesthetic appeal developing distinctive patina over decades. Copper lasts 100+ years—far exceeding typical roof lifespans—making it investment for premium homes, historical restorations, or applications where authenticity and permanence justify costs. Copper runs $15-30 per linear foot installed—3-5 times aluminum pricing. Despite high initial costs, copper's longevity and appearance make it preferred choice for discerning homeowners prioritizing quality over economy.
Lead flashing provides ultimate flexibility conforming to irregular penetrations and transitions. Common for pipe boots and complex details, lead resists weathering and lasts indefinitely. However, lead's weight, cost, and environmental concerns limit applications. Synthetic flashings using rubberized membranes or composite materials offer waterproofing at economy prices but lack metal flashing's longevity and proven performance. For most Northern Virginia homes, aluminum provides optimal balance of durability, cost, and performance suitable for comprehensive roofing protection.
Compatibility Considerations
Flashing materials must remain compatible with adjacent materials preventing galvanic corrosion—electrochemical reaction occurring when dissimilar metals contact in presence of moisture. Aluminum flashing contacting copper components creates corrosion accelerating aluminum deterioration. Similarly, galvanized steel contacting copper degrades rapidly. Separating dissimilar metals with plastic isolation prevents galvanic action preserving both materials.
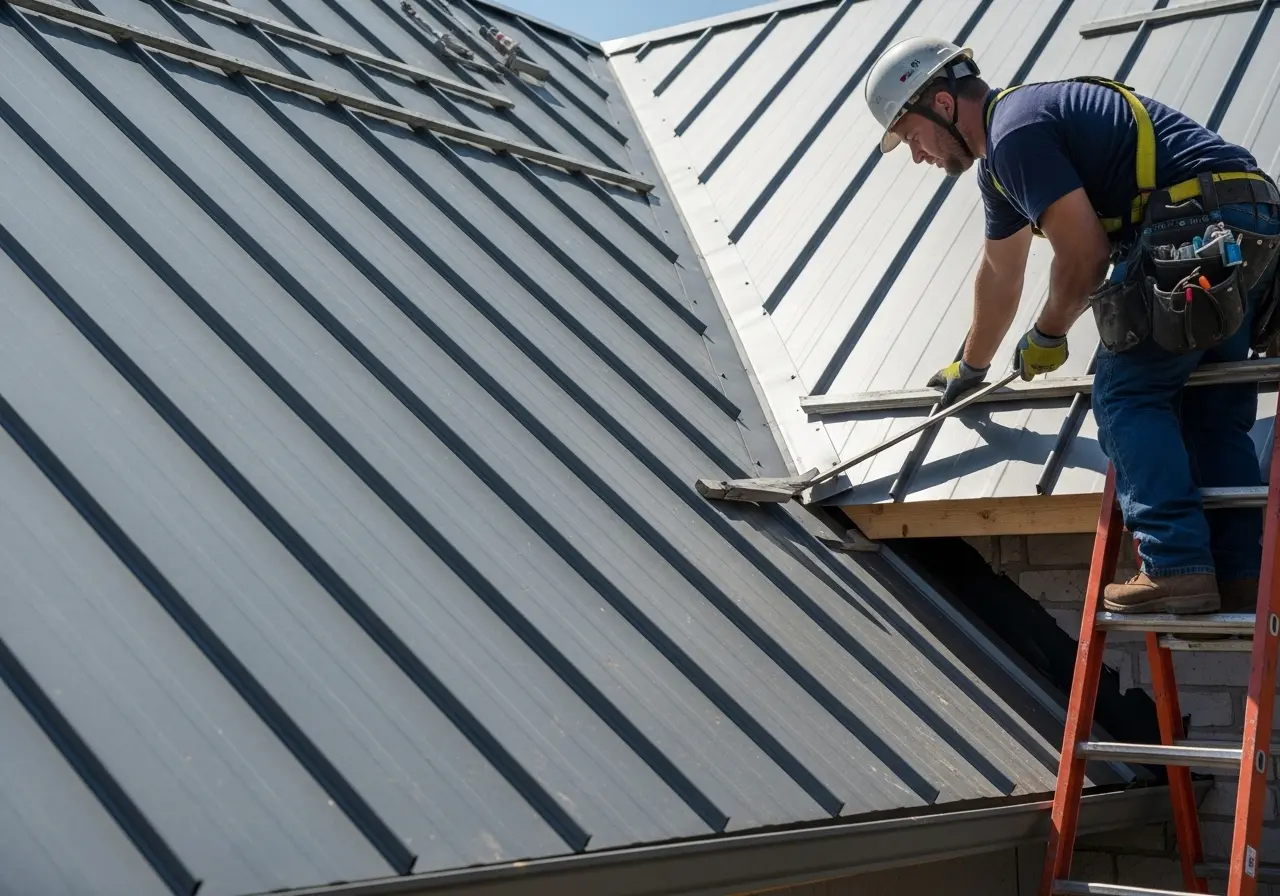
Matching flashing materials to roofing types ensures appropriate flexibility, expansion rates, and fastener compatibility. Asphalt shingle roofs accept standard aluminum or galvanized flashing. Metal roofing requires flashing materials matching roof panels preventing visual mismatch and ensuring compatible thermal expansion. Slate and tile roofs demand specialized flashing profiles accommodating material thickness and profiles. These compatibility considerations guide material selection ensuring integrated systems rather than incompatible components fighting each other through differential movement or corrosion.
Critical Installation Techniques
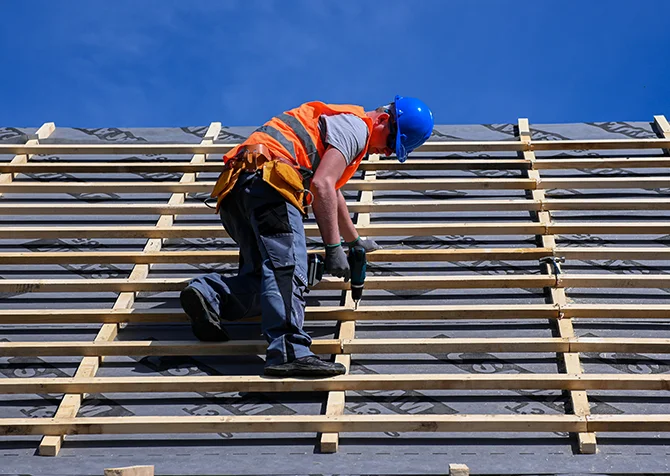
Roofing flashing installation success depends on understanding and implementing proper sequencing, overlap dimensions, and fastening methods. Flashing installs progressively from bottom upward, ensuring upper pieces overlap lower ones by minimum 3-4 inches. This overlap prevents water from wicking backward under flashing—critical principle governing all flashing applications. Overlaps increase in high-exposure areas experiencing wind-driven rain or ice dam formation requiring enhanced protection.
Fastener placement proves critical—nails or screws secure flashing to substrates without creating leak pathways. Top edges receive fasteners while bottom edges remain unfastened, allowing water to drain freely without pooling behind flashing. Fasteners penetrating flashing surfaces must seal properly using appropriate washers, sealants, or caulking preventing water infiltration through fastener holes. Over-driven fasteners distort flashing creating low spots pooling water while under-driven fasteners allow movement compromising water barriers. This precision separates professional installations from amateur attempts plagued by premature failures.
Valley Flashing Best Practices
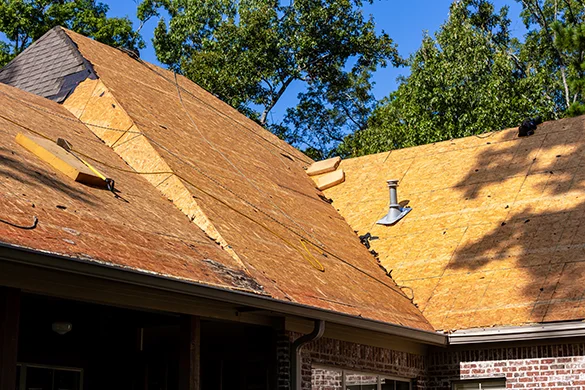
Open valley flashing installation begins with underlayment extending across valley creating first water barrier. Metal valley flashing—typically 24-36 inches wide—centers over valley secured with edge fasteners rather than center fasteners potentially creating leak points. Shingles trim parallel to valley maintaining 2-4 inch metal exposure on each side. This exposure prevents shingles from channeling water under valley edges while providing visual appeal and effective drainage.
Closed valley installation requires careful shingle weaving or cutting ensuring water flows over shingles onto valley flashing rather than under them. Extra adhesive or sealant at shingle edges prevents wind-driven rain infiltration. Some roofers prefer ice and water barrier beneath valley flashing providing additional leak protection—particularly valuable in Northern Virginia's freeze-thaw climate. Proper valley flashing installation prevents the concentrated water flow issues causing majority of valley-related leaks affecting Arlington and Fairfax area roofs.
Step Flashing Installation Details
Step flashing installation along wall-roof intersections requires methodical approach alternating flashing pieces with shingle courses. Each L-shaped flashing piece—typically 5 inches high by 7 inches long—installs with vertical leg against wall and horizontal leg extending onto roof. The piece embeds under wall siding or counter flashing while overlapping onto roof surface. As shingle courses progress upward, each new step flashing piece overlaps the previous one creating continuous barrier.
Common mistake involves installing continuous flashing rather than individual stepped pieces. Continuous flashing cannot accommodate differential movement between roof and wall, leading to separation, buckling, or failure. Proper step flashing remains flexible, moving independently with roof and wall settlement without compromising water barriers. Counter flashing installed over step flashing completes protection, embedding in siding or masonry mortar joints. This two-layer system provides redundant protection ensuring leak prevention even when individual components experience minor failures or displacement.
Chimney Flashing Complexity
Chimney flashing represents most challenging residential flashing application requiring multiple integrated components. Base flashing extends from chimney base across roof surface integrating with surrounding shingles. Step flashing protects upslope and downslope chimney sides using same alternating technique as wall intersections. Back pan or saddle flashing diverts water around chimney's upslope side preventing debris dams and ice accumulation.
Counter flashing completes system, embedding in mortar joints and covering lower flashing layers. Proper counter flashing installation requires cutting reglets (grooves) in mortar joints, inserting flashing, and sealing with appropriate caulk or mortar. DIY attempts often fail at counter flashing, using surface-mounted solutions compromising leak protection. Professional installations integrate all components properly, ensuring watertight chimney protection lasting decades without maintenance. This complexity makes chimney flashing ideal candidate for professional installation rather than DIY attempts risking expensive leak damage to interiors and structures.
Penetration Flashing Techniques
Pipe boot flashing creates watertight seals around plumbing vents and exhaust pipes penetrating roofs. Metal or plastic bases integrate with roofing materials while flexible rubber or thermoplastic boots conform tightly to pipe contours. Proper installation embeds base flashing under upslope shingles while overlapping downslope shingles. Boot material wraps pipe, securing with stainless steel clamps or integrated compression fittings preventing water infiltration at pipe-boot interface.
Common failure points include deteriorated boots cracking from UV exposure or temperature extremes. Replacement every 10-15 years maintains seal integrity preventing leaks. Some premium boots incorporate aluminum or stainless steel construction lasting 30+ years matching roof lifespan. Proper flashing installation for other penetrations—electrical conduits, satellite mounts, roof vents—follows similar principles: metal bases integrating with roofing materials and flexible or formed seals conforming to penetration profiles preventing water entry through these vulnerable roof openings.
Common Flashing Installation Mistakes
Inadequate overlap represents the most frequent flashing error. Installers rushing or lacking training reduce overlaps below minimum 3-4 inch specifications, creating reverse water flow pathways during wind-driven rain or ice dam conditions. Short overlaps particularly problematic in valleys and step flashing where concentrated water flow tests marginal installations. Proper overlaps add minimal material cost while dramatically improving leak resistance throughout roof lifespan.
Improper fastening—including center-punching valley flashing, over-driving fasteners, or using incompatible fastener types—creates leak vulnerabilities and structural weaknesses. Fasteners must suit flashing materials, substrate types, and exposure conditions. Aluminum flashing requires aluminum or stainless fasteners preventing galvanic corrosion. Proper fastener placement, spacing, and driving depth separate professional work from amateur installations compromising flashing effectiveness despite using quality materials and appropriate profiles.
Sealant Misuse and Over-Reliance
Excessive sealant application attempting to compensate for poor flashing installation creates more problems than it solves. Sealants degrade faster than metal flashing—typically 5-15 years versus 30-50 years for metal. Relying on sealant rather than proper mechanical integration creates maintenance burdens and leak vulnerabilities when sealant fails. Quality flashing installation uses sealant sparingly—sealing specific joints and fastener penetrations rather than slathering it everywhere masking installation deficiencies.
Using inappropriate sealant types accelerates failure. Asphalt-based products deteriorate rapidly under UV exposure. Silicone sealants prevent paint adhesion and don't bond well to dirty or wet surfaces. Polyurethane or elastomeric sealants specifically formulated for roofing applications provide superior adhesion, flexibility, and longevity. Understanding sealant limitations and proper applications prevents over-reliance on products incapable of compensating for fundamental installation errors affecting Northern Virginia homes requiring comprehensive roof protection.
Integration with Ice and Water Barrier
Ice and water barrier—self-adhering waterproof membrane—enhances flashing protection in vulnerable areas prone to ice dams, wind-driven rain, or heavy water flow. This rubberized membrane installs beneath flashing and shingles creating additional leak protection when primary barriers experience stress. Building codes in cold climates require ice and water barrier at eaves, valleys, and around penetrations complementing metal flashing installation.
Proper integration installs ice and water barrier before metal flashing, allowing flashing to overlay membrane. This layering ensures water contacting flashing drains onto membrane rather than behind it. The membrane's adhesive properties seal around fastener penetrations preventing leaks at these potential weak points. Combined flashing and membrane protection proves especially valuable in Northern Virginia where ice dams, severe thunderstorms, and high winds challenge roof waterproofing creating conditions demanding redundant protection systems rather than minimal installations barely meeting code requirements.
Maintenance and Long-Term Performance
Quality roofing flashing installation requires minimal maintenance beyond periodic inspection ensuring continued effectiveness. Annual roof inspections should examine flashing for corrosion, loosened fasteners, separated joints, or sealant deterioration. Address issues promptly preventing minor problems from escalating into major leaks requiring extensive repairs. Pay particular attention to chimney flashing, valley areas, and pipe penetrations where problems commonly develop.
Debris removal proves especially important for valleys and behind chimneys where accumulation creates dams backing up water behind flashing. Clean gutters prevent overflow potentially compromising drip edge and eave flashing. Trim overhanging branches preventing physical damage to flashing from falling limbs or wind-driven contact. These simple maintenance tasks preserve flashing integrity throughout decades of service, protecting initial installation investment while preventing leak damage costing thousands in repairs to ceilings, insulation, and structural components throughout Alexandria properties.
When to Replace Flashing
Flashing replacement becomes necessary when corrosion perforates metal, physical damage compromises integrity, or separation from substrates creates leak pathways. Aluminum flashing typically lasts 30-50 years when properly installed and maintained. Galvanized steel may require earlier replacement—particularly in humid coastal climates—when rust compromises structural integrity. Copper flashing lasts indefinitely, potentially outliving multiple roof replacements.
Complete flashing replacement during roof replacement represents best practice even when existing flashing appears serviceable. New roofing warranties often require complete flashing replacement maintaining coverage. Attempting to preserve 20-30 year old flashing during re-roofing risks premature leaks compromising new roof investment. The incremental cost adding flashing replacement to roof replacement proves minimal—typically $500-1,500 for residential installations—compared to leak damage or warranty complications from preserving marginal flashing components past reasonable service life.
Code Requirements and Best Practices
International Residential Code (IRC) establishes minimum flashing requirements for various roof applications. Valleys require corrosion-resistant metal extending minimum 12 inches each side of centerline. Wall intersections require step flashing minimum 4 inches high with 4 inch headlaps. Chimney flashing must provide complete protection around all sides with proper counter flashing. Local jurisdictions may adopt more stringent requirements addressing regional climate challenges or specific performance objectives.
Best practices often exceed code minimums, particularly for challenging climate conditions or premium installations. Wider valley flashing (24-36 inches), increased overlaps (6 inches versus 4 inch code minimum), and enhanced ice and water barrier coverage provide superior protection justifying minimal additional costs. Industry standards from National Roofing Contractors Association (NRCA) and Asphalt Roofing Manufacturers Association (ARMA) offer detailed guidance beyond code minimums. Quality contractors follow these enhanced standards delivering superior long-term performance rather than barely meeting minimum legal requirements.
Warranty Considerations
Shingle manufacturer warranties increasingly require proper flashing installation maintaining coverage for leak-related claims. Improper valley flashing, missing step flashing, or inadequate chimney protection can void warranty coverage when leaks occur. Insurance claims for water damage may face scrutiny when flashing installation fails to meet code or industry standards. These warranty and insurance considerations extend beyond building code compliance, affecting financial protection for roof investments.
Contractor workmanship warranties should specifically cover flashing installation separate from general roofing work. Quality contractors guarantee leak-free performance for 2-10 years depending on company policy and project scope. These guarantees provide recourse when flashing failures cause leaks despite proper material selection. Understanding warranty coverage—both manufacturer and contractor—helps homeowners make informed decisions protecting against leak damage and ensuring accountability when problems develop affecting Northern Virginia properties requiring professional roofing services.

Choosing Qualified Roofing Contractors
Proper roofing flashing installation demands skilled contractors understanding material properties, installation sequences, and integration techniques. Verify contractor experience by requesting references from recent projects including complex flashing applications—chimneys, dormers, multiple valleys. Examine completed work evaluating quality, attention to detail, and proper technique implementation. Contractors unable to explain flashing types, installation methods, or code requirements clearly may lack expertise ensuring leak-free installations.
Detailed written estimates should itemize flashing materials by type, quantity, linear footage, and costs. Vague "includes all materials" estimates allow contractors to skimp on flashing quality or quantity without accountability. Discuss specific flashing details—valley type, step flashing specifications, sealant types—ensuring contractor plans meet or exceed code requirements and industry best practices. Request photographs documenting flashing installation before final shingle placement, providing verification of proper work hidden beneath finished roofing.
Questions to Ask Contractors
Informed homeowners ask specific questions ensuring quality flashing installation. Essential inquiries include: What flashing materials and profiles do you propose for valleys, penetrations, and wall intersections? How do you integrate flashing with ice and water barrier? What overlap dimensions and fastening methods do you use? Do you install step flashing individually or use continuous pieces? How do you handle chimney counter flashing?
Additional critical questions address experience and guarantees: How many years have you installed roofing flashing? Can you provide references specifically for complex flashing work? What warranties cover flashing installation—both material and workmanship? How do you document proper flashing installation for warranty purposes? What happens if flashing leaks develop within warranty period? These questions reveal contractor knowledge and professionalism while establishing accountability protecting homeowner investments in quality roofing systems delivering decades of leak-free performance.

Regional Considerations for Northern Virginia
Northern Virginia's climate presents specific challenges demanding robust flashing installation. Heavy thunderstorms deliver intense rainfall testing valley and penetration flashing with concentrated water flow. Freeze-thaw cycles create ice dams backing water up roof slopes where flashing must prevent infiltration despite water flowing opposite to normal drainage patterns. High humidity promotes corrosion making material selection and proper fastening critical for long-term performance.
Local building codes in Fairfax, Loudoun, and Prince William counties require flashing installation meeting IRC standards minimum. Some localities mandate ice and water barrier at valleys and around all penetrations addressing regional freeze-thaw challenges. HOA regulations in planned communities may restrict visible flashing colors requiring neutral tones or colors matching roofing materials. Working with locally experienced contractors familiar with these requirements ensures code compliance while addressing regional performance demands protecting homes throughout Northern Virginia's varied weather conditions and architectural styles.
Ready to Ensure Leak-Free Flashing Installation?
Roofing flashing installation represents the critical difference between leak-prone roofs and reliable systems protecting homes for decades. Understanding flashing types, proper installation techniques, material selection, and common mistakes helps Northern Virginia homeowners ensure re-roofing projects include quality flashing work preventing water damage and structural deterioration. Whether replacing complete roofing systems or addressing specific leak issues, proper flashing installation provides essential protection making it wise investment regardless of project scope.
Reston Roof provides expert roofing services throughout Northern Virginia including professional flashing installation on all residential roofing projects. Our experienced craftsmen understand complex flashing details required for chimneys, valleys, dormers, and penetrations. We use quality materials—aluminum, copper, or galvanized steel—properly integrated with underlayment, ice and water barrier, and roofing materials. Our installations meet or exceed code requirements while following industry best practices ensuring leak-free performance backed by comprehensive warranties. Contact us at (571) 453-6515 for free roofing consultation. We'll inspect your roof, identify flashing vulnerabilities, and provide detailed estimates for proper installation protecting your home from water damage. Invest in quality flashing installation preventing leaks from day one—your home deserves professional craftsmanship delivering decades of reliable, worry-free roof performance.
Frequently Asked Questions
What is roof flashing and why is it critical for leak prevention?
Roof flashing is thin metal or composite material installed at transitions, penetrations, and valleys where roofing materials alone cannot provide adequate waterproofing. It directs water away from vulnerable areas where different building elements meet. Despite representing just 5 to 10 percent of total roofing costs, proper flashing installation prevents approximately 90 percent of roof leaks on residential roofing systems.
How much does roof flashing installation cost?
Roof flashing installation costs vary by type and material. Aluminum flashing runs $3 to $8 per linear foot installed, galvanized steel costs $2 to $6 per linear foot, and copper ranges from $15 to $30 per linear foot. Complete flashing replacement during a roof replacement typically adds $500 to $1,500 to the total project cost for residential installations.
What are the most common flashing installation mistakes?
The most frequent mistakes include inadequate overlaps below the 3 to 4 inch minimum, improper fastener placement creating leak pathways, incorrect installation sequencing, over-reliance on sealants instead of proper mechanical integration, and using continuous flashing at wall intersections instead of individual stepped pieces that accommodate differential movement between roof and wall.
How long does roof flashing typically last?
Aluminum flashing lasts 30 to 50 years when properly installed and maintained. Galvanized steel may require earlier replacement in humid climates when rust compromises structural integrity. Copper flashing lasts indefinitely, potentially outliving multiple roof replacements. Pipe boot flashing with rubber components should be replaced every 10 to 15 years to maintain seal integrity. Learn about related components in our drip edge installation guide.
Should all flashing be replaced during a roof replacement?
Yes. Complete flashing replacement during roof replacement is recommended best practice even when existing flashing appears serviceable. New roofing warranties often require complete flashing replacement to maintain coverage. The incremental cost of $500 to $1,500 is minimal compared to leak damage or warranty complications from preserving 20 to 30 year old flashing components.