Roof Flashing Repair Guide for Northern Virginia Homeowners
Roof flashing repair is one of the most important maintenance tasks a Northern Virginia homeowner can address before a small problem becomes a costly interior disaster. Flashing is the metal or composite material installed wherever your roof meets a wall, chimney, vent pipe, skylight, or valley. Its sole purpose is to direct water away from these vulnerable intersections so moisture never reaches the wood decking, insulation, or drywall beneath your roofing materials.
When flashing fails in Reston, Herndon, Sterling, or anywhere across Fairfax County, water infiltrates the roof assembly and causes rot, mold, and structural damage that costs thousands to repair. The frustrating part is that most flashing failures are preventable with regular inspection and timely maintenance. This guide explains how flashing works, what causes it to fail in our regional climate, what repairs cost, and when you should call a professional versus attempting a fix yourself.
What Is Roof Flashing and Why Does It Matter?
Roof flashing creates a watertight barrier at every point where the continuous roofing surface is interrupted or changes direction. Chimneys, plumbing vents, exhaust fans, skylights, dormers, and valleys all require flashing to prevent water from seeping into gaps that shingles alone cannot cover. Without properly functioning flashing, even a brand-new roof will leak.
Flashing works by overlapping with surrounding roofing materials in a specific sequence so that water always flows over the flashing and onto the shingles below, never underneath. Each type of roof penetration uses a different flashing configuration, and each configuration has its own potential failure points. Understanding these systems helps you recognize problems early when professional roof repairs are simple and affordable rather than after water has already damaged your ceiling, walls, and attic framing.
Most properly installed flashing lasts 20 to 30 years on standard materials, though Northern Virginia's climate puts extra stress on these components compared to drier, milder regions. The combination of freeze-thaw cycles, intense summer heat, and frequent thunderstorms creates conditions that test every seam, fastener, and sealant joint in your flashing system year-round.
Common Causes of Flashing Failure in Northern Virginia
Northern Virginia's climate is uniquely hard on roof flashing. Between November and March, the region experiences 40 to 60 freeze-thaw cycles in a typical winter. Water seeps into the tiniest gap between flashing and chimney mortar during the day, freezes overnight, expands, and widens that gap with every cycle. Over five to ten winters, joints that were originally watertight open up enough to admit wind-driven rain during spring storms.
Summer brings its own challenges. Roof surface temperatures on homes throughout Reston, Fairfax, and Arlington regularly exceed 150 degrees Fahrenheit on dark-colored shingles. That extreme heat bakes rubber vent boots until they crack and harden. Metal flashing expands and contracts with each temperature swing, gradually loosening the fasteners holding it in place. UV radiation degrades roofing sealants and caulks that were applied during original installation, turning flexible sealant into brittle material that cracks away from surfaces.
Improper installation remains the leading cause of premature flashing failure regardless of climate. Contractors who skip counter-flashing on chimneys, use inadequate overlap at step-flashing transitions, or substitute roofing cement for proper mechanical attachment create problems that show up within the first few years. Physical damage from fallen branches is also common in wooded neighborhoods around Great Falls, McLean, and the tree-lined communities along Difficult Run in Oakton.
Identifying Flashing Problems: Interior and Exterior Warning Signs
Catching flashing problems early saves money. Inside your home, look for water stains on ceilings or walls near chimneys, exterior walls, or skylights. Water running down the interior face of your chimney during rain points directly to chimney flashing failure. Musty odors in the attic, especially near roof penetrations, reveal hidden moisture from slow leaks that haven't yet created visible staining downstairs.
From the outside, visible rust streaks on metal flashing, lifted or separated flashing edges, cracked rubber vent boots, and deteriorated sealant around chimney bases are all clear indicators. Missing or displaced counter-flashing on chimneys is especially common on homes in Herndon, Sterling, and Centreville where builders occasionally cut corners on the initial installation to save time.
Peeling paint on soffits, fascia, or interior ceilings near roof transitions often signals ongoing moisture intrusion from a flashing leak. Don't ignore small stains. A minor flashing gap that allows a few drops per rainstorm becomes a major water damage project within a single season. The cost of ignoring flashing problems is always higher than the cost of fixing them, which is why regular inspections are part of any smart roof maintenance strategy.
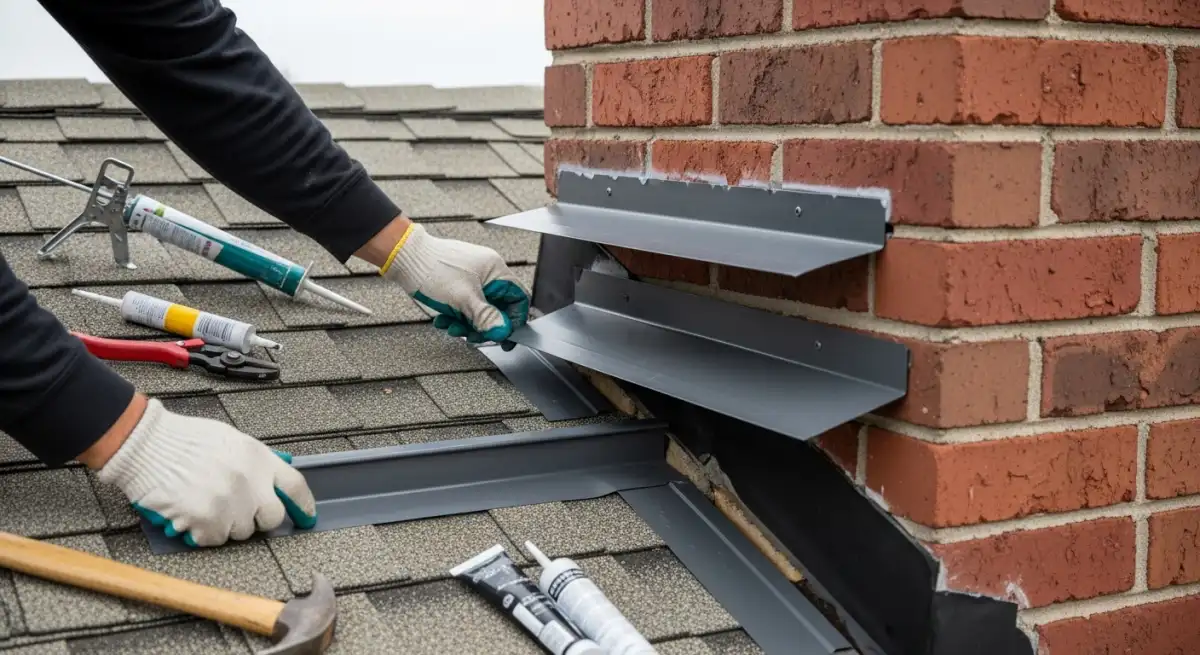
Chimney Flashing: The Most Complex Repair
Chimney flashing is a multi-component system that many homeowners and even some contractors don't fully understand. The system uses step flashing—L-shaped metal pieces woven between each course of shingles along the chimney sides—combined with counter-flashing that is embedded into the chimney mortar joints and folds down over the step flashing. This two-layer approach prevents wind-driven rain from getting behind the flashing.
Wide chimneys over 30 inches require a cricket or saddle on the uphill side to divert water around the chimney rather than allowing it to pool against the back wall. Without a cricket, water accumulates behind the chimney during heavy rain and eventually forces its way through seams. Homes throughout Fairfax County built in the 1970s and 1980s frequently lack crickets because building codes didn't require them at the time.
Chimney flashing repair ranges from simple sealant touch-ups costing $300 to $600 to complete replacement running $800 to $1,800. Complete replacement involves removing shingles around the chimney perimeter, cutting new reglets in the mortar joints for counter-flashing, installing new step flashing woven with shingles, and sealing everything with high-grade polyurethane sealant. This is not a DIY project. It requires masonry cutting tools, specialized flashing bending equipment, and experience integrating multiple waterproofing layers.
Vent Pipe and Skylight Flashing Repairs
Plumbing vent pipes use boot-style flashing with a rubber or neoprene collar that seals tightly around the pipe. The metal base integrates with surrounding shingles to shed water. These boots are the most common flashing failure point on homes across Northern Virginia because the rubber collar cracks from UV exposure and the dramatic temperature swings between our winter lows near 10 degrees Fahrenheit and summer highs pushing past 95.
The good news is that vent boot replacement is one of the simplest and least expensive roof repairs. Replacement boots cost $15 to $40, and the work takes an experienced roofer less than an hour. If you catch a cracked boot before it leaks, you prevent water from running down the pipe into walls and ceilings where it causes extensive hidden damage. Inspect your vent boots every three to five years and replace any showing visible cracks or hardened rubber.
Skylight flashing is more complex. Quality skylights include manufacturer-specific flashing kits with pieces designed for that exact model. Problems arise when contractors substitute generic flashing or fail to follow the precise bottom-to-top installation sequence. Skylight flashing repair often requires complete system replacement rather than spot fixes, running $500 to $2,000 depending on the skylight size and roof pitch. Condensation inside the skylight shaft or stains around the frame during dry weather may indicate flashing issues rather than glass seal failure.
Valley Flashing: High-Volume Water Channels
Valleys collect water from two roof slopes and funnel it toward the gutters, creating the highest-volume drainage channels on your roof. Open valleys use visible metal flashing in W-valley or standing seam profiles that are easy to inspect and maintain. Woven or closed valleys hide flashing beneath interlaced shingles, making problems harder to spot without removing material.
Valley flashing fails when debris accumulates and traps moisture against the metal, when impact damage from fallen branches punctures the flashing, or when shingle installers cut too close to the valley centerline and leave inadequate flashing exposure. Ice dams during Northern Virginia winters force water uphill under valley edges that were designed for downward flow only, which is why ice and water shield membrane beneath valley flashing is code-required in our region.
Valley flashing repair ranges from simple debris clearing and sealant work at $200 to $500 to complete metal replacement requiring extensive shingle removal at $1,200 to $2,500. Homes with complex roof geometries in neighborhoods throughout McLean and Great Falls often have multiple valleys that should be inspected as a system rather than individually.
Flashing Materials: Options and Lifespans
The material you choose for flashing repair affects both cost and longevity. Galvanized steel is the most economical option at $2 to $4 per linear foot and lasts 20 to 30 years under normal conditions. It will eventually rust, especially where the protective zinc coating gets scratched during installation or foot traffic.
Aluminum costs $3 to $6 per linear foot and resists corrosion better than steel while weighing less. It is softer and dents more easily, but it won't rust even in Northern Virginia's humid climate. Copper is the premium choice at $15 to $25 per linear foot, lasting 70 or more years with minimal maintenance. It develops a protective green patina over time that many homeowners in historic neighborhoods find attractive.
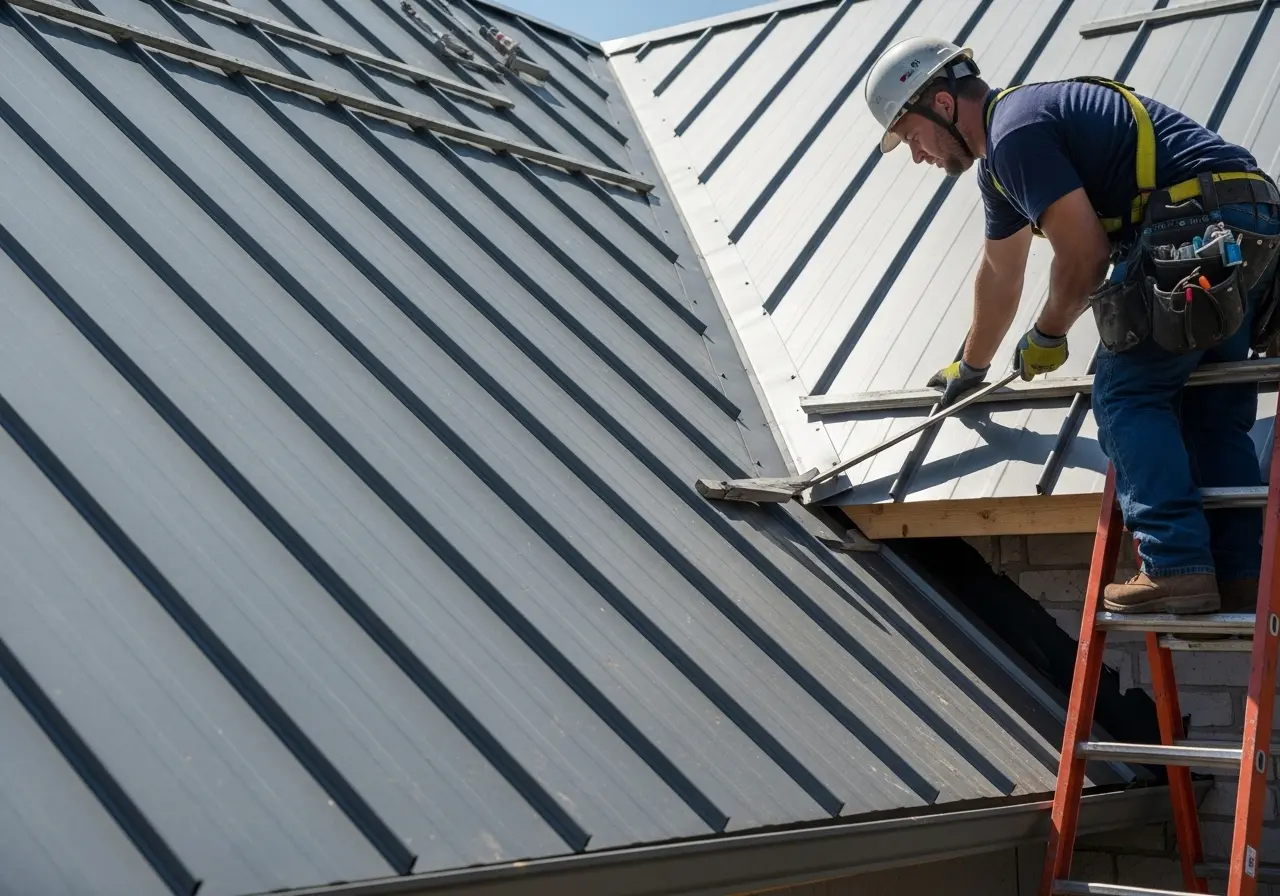
Stainless steel at $10 to $18 per linear foot provides excellent corrosion resistance without copper's high cost. Match your flashing material to your roof's expected remaining lifespan. Installing copper flashing on a roof with 10 years of shingle life left is poor value. But on a new standing seam metal roof expected to last 50 years, copper flashing makes excellent financial sense.
Roof Flashing Repair Costs in Northern Virginia
Understanding typical pricing helps you evaluate contractor quotes and budget appropriately. Northern Virginia labor rates run 15 to 20 percent above national averages, and roof work involving steep pitches or multi-story homes commands additional charges for safety equipment and setup time. The table below reflects realistic 2026 pricing for the greater Reston, Fairfax, and Loudoun County market.
| Repair Type | Cost Range | Time Required | DIY Feasible? |
|---|---|---|---|
| Vent Boot Replacement | $150 - $500 | 1 - 2 hours | Yes, with caution |
| Chimney Sealant Repair | $300 - $600 | 2 - 3 hours | No |
| Full Chimney Flashing Replacement | $800 - $1,800 | 4 - 8 hours | No |
| Skylight Flashing Repair | $500 - $2,000 | 3 - 6 hours | No |
| Valley Flashing Partial Repair | $400 - $800 | 2 - 4 hours | No |
| Valley Flashing Full Replacement | $1,200 - $2,500 | 6 - 10 hours | No |
| Drip Edge Replacement (per side) | $200 - $500 | 2 - 3 hours | No |
These costs include labor, materials, and any shingle removal and reinstallation needed to access the flashing. While prices may seem steep for what appears to be a small repair, consider that a single ceiling restoration from leak damage easily exceeds $2,000 once you factor in drywall, insulation, painting, and potential mold remediation. Comparing these costs to full roof replacement expenses shows that timely flashing repair represents excellent value.
Preventing Future Flashing Problems
Annual roof inspections catch flashing issues before they leak. Walk around your property each spring and fall, examining visible flashing for rust, gaps, lifted edges, or cracked sealant. Check attic spaces after heavy rains for water stains along chimney chases and around vent pipe penetrations. Clear debris from valleys and around chimney bases where leaves and branches trap moisture against flashing surfaces.
Address small problems immediately. A $200 sealant touch-up today prevents a $1,500 flashing replacement next year. Trim overhanging tree branches that drop debris and can physically damage flashing during storms. This is especially important for homes in the heavily wooded neighborhoods of Oakton, Great Falls, and the Reston Nature Center corridor where mature tree canopy hangs close to rooflines.
When repairing flashing, consider upgrading materials if the cost difference is modest. Spending an extra $200 for copper or stainless steel instead of galvanized steel makes sense if it doubles or triples the expected service life. Quality materials paired with proper installation from an experienced local roofing contractor eliminates recurring problems that waste both money and peace of mind.
Get Expert Flashing Repair in Northern Virginia
Reston Roofing specializes in diagnosing and repairing flashing failures throughout Northern Virginia. Our experienced team understands the nuances of chimney, vent, skylight, and valley flashing systems and the specific ways our regional climate stresses these components. We provide thorough on-roof assessments, transparent written estimates, and quality workmanship that stops leaks permanently.
Serving homeowners across Reston, Fairfax, Sterling, Arlington, Ashburn, Centreville, and surrounding communities, we offer comprehensive flashing services including inspection, repair, and preventive maintenance programs. Every repair comes with a workmanship warranty and our commitment to doing the job right the first time.
Call us today at (571) 453-6515 or schedule a consultation online. We will inspect your flashing, explain exactly what needs attention, and provide honest recommendations that protect your home for years to come.
Frequently Asked Questions
How much does roof flashing repair cost in Northern Virginia?
Roof flashing repair costs in Northern Virginia range from $150 to $500 for a single vent boot replacement, $300 to $600 for minor chimney flashing sealant work, $800 to $1,800 for full chimney flashing replacement, and $500 to $2,500 for valley flashing repair or replacement. Prices vary based on roof pitch, material type, and accessibility. Northern Virginia labor rates run about 15 to 20 percent above national averages.
What are the signs of failing roof flashing?
Common signs of failing roof flashing include water stains on ceilings or walls near chimneys and exterior walls, damp or musty odors in the attic, visible rust or corrosion on metal flashing, lifted or separated flashing edges along roof penetrations, peeling paint around roof transitions, and water running down the interior face of a chimney during rain. Any of these signs warrant prompt inspection by a qualified roofer.
Can I repair roof flashing myself or do I need a professional?
Simple vent boot replacements are manageable DIY projects if you are comfortable working on a roof with proper fall protection. However, chimney flashing, skylight flashing, and valley flashing require professional expertise due to complex multi-component systems and precise installation sequences. Mistakes on these systems often cause leaks worse than the original problem and can void manufacturer warranties.
How long does roof flashing last before it needs replacement?
Galvanized steel flashing lasts 20 to 30 years. Aluminum flashing lasts 25 to 35 years. Copper flashing lasts 70 or more years. Rubber vent boots typically last 10 to 15 years before UV exposure and temperature cycling cause cracking. Northern Virginia's freeze-thaw cycles and humidity can shorten these lifespans, especially on south-facing roof slopes with heavy sun exposure.
Does homeowners insurance cover roof flashing repair in Virginia?
Homeowners insurance typically covers roof flashing damage caused by sudden events like storms, fallen trees, or hail. It generally does not cover damage from gradual wear, deferred maintenance, or age-related deterioration. If a windstorm tears your flashing loose and causes a leak, your policy likely covers the repair minus your deductible. Document all storm damage with photos and contact your insurer promptly.