How to Repair a Roof Leak in an Emergency: Temporary Fixes to Save Your Northern Virginia Home
When water starts dripping through your ceiling during a storm, panic often sets in. While emergency roof leak situations demand quick action, knowing how to repair a roof leak temporarily can save your Northern Virginia home from extensive water damage while you arrange professional repairs. The difference between a $500 repair and a $15,000 remediation project often comes down to what you do in the first few hours after discovering an active leak.
Northern Virginia's weather patterns create prime conditions for emergency roof leak situations. Summer thunderstorms dump two or more inches of rain in 30 minutes, overwhelming aging flashing and worn shingles. Winter ice dams force water under shingle courses on homes throughout Reston, Herndon, Oakton, and Vienna where attic insulation doesn't meet current standards. Fall wind events strip shingles from exposed ridge lines, and spring temperature swings open seams that were sealed tight during summer. This guide covers proven emergency fixes that Northern Virginia homeowners can safely implement when weather or timing prevents immediate permanent solutions.
Control Interior Water Damage Before Touching the Roof
Your first priority during an active roof leak is not fixing the roof itself. It is managing the water that is already inside your home to minimize damage to floors, walls, furniture, and electrical systems. Move furniture, electronics, and valuables away from the leak path immediately. Place buckets, plastic bins, or waterproof containers under all active drip points. Use old towels or absorbent cloths to soak up standing water from hardwood floors, carpets, and furniture surfaces before it penetrates and causes permanent staining or warping.
If water is pooling in your ceiling and creating a visible bulge, carefully puncture the lowest point with a screwdriver to create controlled drainage into a bucket positioned below. This may seem counterintuitive, but it prevents the far more damaging scenario of sudden ceiling collapse that dumps gallons of accumulated water across your living space without warning. For active leaks during intense storms common in Northern Virginia, set up a rotation of containers and check them every 30 minutes to prevent overflow. Understanding common leaking roof repair mistakes helps you avoid actions that make emergency situations worse.
Document everything with photos and videos before, during, and after your emergency response efforts. Capture water entry points, interior damage, ceiling and wall stains, damaged personal property, and any visible roof damage once weather permits safe observation. This documentation proves essential for insurance claims processing and helps your roofing contractor understand the full scope of damage when they arrive for assessment. Most Northern Virginia homeowner insurance policies cover emergency mitigation costs when properly documented.
Interior Tarp Installation: The Safest Emergency Response
When weather conditions make roof access dangerous, you can create effective temporary protection from inside your attic. This method works well for localized leaks and keeps you safely off a wet, slippery roof during active storms. It is the approach that professional emergency roofers recommend for homeowners dealing with active leaks during rain.
Locate the leak source in your attic by following water trails on the underside of roof decking back to the entry point. Water often travels several feet along rafters and sheathing before dripping through the ceiling below, so the ceiling stain location may not directly correspond to where water is entering the roof. Use a flashlight to trace moisture trails along wood surfaces, looking for active drips, wet insulation, and dark staining on the underside of plywood or OSB decking.
Once you identify the entry point, slide a heavy plastic tarp or emergency roof patch material between the roof decking and insulation, extending it at least two feet beyond the leak point in all directions. The tarp should run from above the leak point down past it, creating a barrier that channels water along the tarp's surface and away from the breach into a bucket positioned at the lowest point. Weight the tarp edges with boards or heavy objects in the attic to prevent shifting. This technique works for asphalt shingle roofs, metal roofing systems, and other pitched roof systems where attic access exists.
Exterior Tarping Techniques for Larger Damage Areas
Once rain subsides and surfaces dry enough for safe access, exterior tarping provides superior protection for moderate to severe leak areas. Use heavy-duty polyethylene tarps rated at least 6-mil thick. The blue or silver poly tarps available at hardware stores in Reston, Herndon, and throughout Northern Virginia work well for temporary emergency protection when properly installed.
The tarp must extend from above the leak point, ideally over the roof ridge if possible, down past the leak and over the gutter line. This ensures water flowing down the roof runs over the tarp surface rather than underneath it. Secure the top edge by sandwiching it between two 2x4 boards fastened with screws into the roof decking through the tarp, creating a weather-tight seal at the uphill edge. Use sandbags, weighted boards, or water-filled containers to hold the tarp sides and bottom edge securely in place.
Never rely solely on stakes driven through the tarp into the roof. Each penetration creates a new potential leak point that persists long after the tarp is removed. For flat roof emergencies, weight the tarp edges thoroughly since there is no gravity slope to assist water flow away from the breach. On flat roofs, ensure the tarp extends well beyond the damaged area and that drainage paths remain clear to prevent ponding on top of the tarp itself.
Roof Cement Application for Small Cracks and Missing Shingles
For minor leaks caused by missing shingles, small cracks, or loose flashing, roofing cement provides effective temporary sealing when applied correctly under proper conditions. This method only works when the roof surface is completely dry. Roof cement will not adhere to wet surfaces, and rain will wash uncured product away before it creates a seal. Wait for at least 24 hours of dry weather before attempting cement-based emergency repairs.
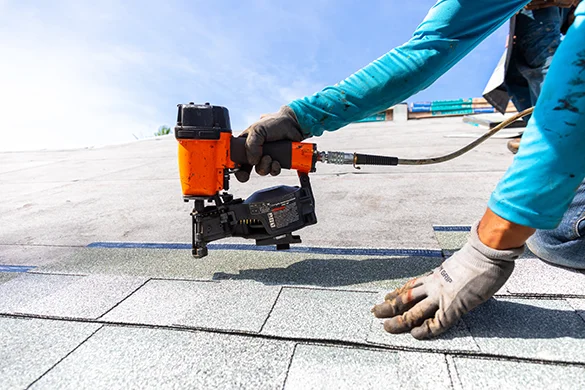
Clean the repair area thoroughly, removing debris, loose granules, deteriorated sealant, and any material that prevents the cement from bonding directly to sound substrate. Apply a generous layer of roof cement or roofing sealant rated for exterior use, extending coverage at least four inches beyond the visible damage in all directions. For lifted shingles, carefully lift the damaged shingle tab, apply cement underneath across the full contact area, press firmly into position, then add another layer of cement over the edges and any exposed nail heads.
Missing shingles require a different approach. Cut a piece of sheet metal or galvanized flashing slightly larger than the exposed area, slide it under the shingle course above the gap with at least three inches of overlap, and cement it in place with roofing sealant applied both above and below the metal patch. This creates a temporary water barrier until proper shingle repair or replacement can occur. Cement-based repairs typically last weeks to months depending on UV exposure and temperature cycling but are not permanent solutions and must be replaced with proper repairs.
Emergency Repair Cost Breakdown for Northern Virginia
Understanding typical costs for emergency roof repairs helps you budget appropriately and evaluate contractor pricing. Northern Virginia emergency roofing costs reflect the region's higher labor rates and the premium charged for after-hours and weekend response. The following table outlines typical costs for common emergency repair scenarios across the NOVA market.
| Emergency Repair Type | Typical Cost Range | Duration of Fix | Best For |
|---|---|---|---|
| Emergency tarp installation | $300 - $800 | 2 - 4 weeks | Large damage areas, storm damage |
| Roof cement patch (small area) | $150 - $400 | 1 - 6 months | Minor cracks, lifted shingles |
| Emergency shingle replacement | $250 - $600 | Permanent | Missing or blown-off shingles |
| Flat roof emergency patch | $400 - $1,200 | 3 - 12 months | Membrane punctures, seam failures |
| Flashing emergency seal | $200 - $600 | 1 - 6 months | Chimney, vent, skylight leaks |
| After-hours service premium | $150 - $300 | N/A | Evenings, weekends, holidays |
Prices reflect typical Northern Virginia market rates. Permanent repairs following emergency stabilization are additional costs. Insurance may cover emergency mitigation and permanent repairs for storm-related damage.
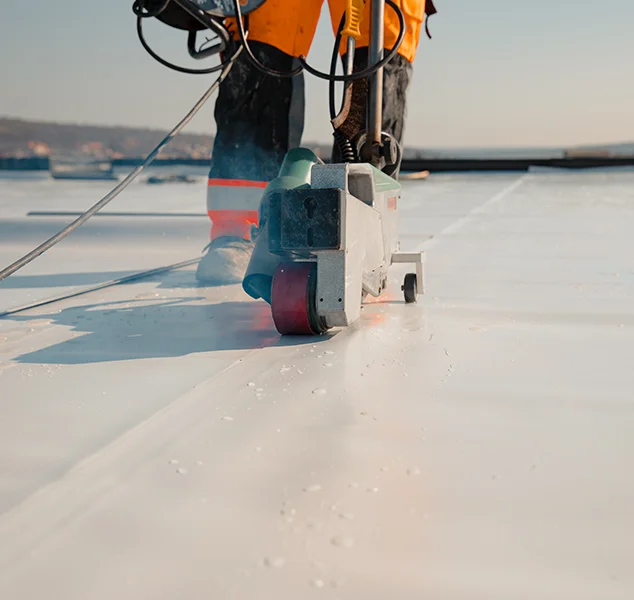
Emergency Patch Kits for Flat Roof Systems
Flat roof emergencies on commercial buildings and residential additions throughout Northern Virginia demand different techniques than sloped roof repairs. Rubber membrane systems like EPDM and thermoplastic membranes like TPO can often be temporarily patched using emergency repair kits available at roofing supply stores along the Route 28 corridor and throughout the Dulles area.
For EPDM emergency repairs, clean and dry the damaged area thoroughly using EPDM membrane cleaner. Apply the primer included in the repair kit according to manufacturer instructions, then position the rubber patch over the damage with at least three inches of overlap in all directions. Apply heavy pressure using a seam roller to eliminate air bubbles and ensure complete adhesive contact across the entire patch surface. EPDM patches properly applied to clean, dry surfaces can provide months of reliable protection.
TPO and PVC roofing systems benefit from heat-activated patches if you have access to a roofing heat gun and understand the welding process. Heat-welded patches create superior bonds that can function as semi-permanent repairs when executed correctly. If you lack the equipment or experience for heat welding, adhesive-based emergency patches provide adequate temporary protection. For commercial buildings with large flat roof areas, calling professional emergency roofing services often proves more cost-effective than attempting DIY repairs on complex membrane systems where mistakes can cause more damage than the original problem.
Safety Protocols That Cannot Be Compromised
Emergency roof repairs often happen under stressful conditions that push homeowners to take risks they would never consider under normal circumstances. Safety must remain the absolute top priority regardless of how urgently you want to stop water from entering your home. More Northern Virginia homeowners are injured attempting emergency roof access than suffer property damage from waiting for professional help to arrive.
Never attempt roof access during active rain, lightning, high winds, or on wet surfaces. Wet asphalt shingles become as slippery as ice. If the roof pitch exceeds what you can comfortably stand on in dry conditions, stay off it during emergencies. Steep roofs with pitches of 6:12 or greater require fall protection equipment and experience that most homeowners lack. Darkness compounds every danger exponentially. Wait for daylight even if that means another night of bucket rotation and towel management inside your home.
When roof access is necessary, use proper ladder technique. Extend the ladder at least three feet above the roof edge, secure the base on level ground, and maintain three points of contact while climbing. Have a second person foot the ladder from below throughout your time on the roof. Wear shoes with excellent rubber-sole traction, never work alone, and keep your phone accessible and charged in case of emergency. For complex situations, dangerous roof configurations, or any scenario where you feel unsafe, the wisest emergency response is controlling interior damage and calling professionals. Understanding when to hire specialists versus attempting DIY could prevent a serious injury.
Transitioning from Emergency Fixes to Permanent Repairs
Emergency fixes buy time but they are never permanent solutions. Once you have stabilized the immediate situation and prevented active water entry, contact qualified roofing contractors to schedule proper diagnosis and permanent repairs. Northern Virginia's weather patterns mean that temporary patches applied during spring storms may need to survive summer heat exceeding 95 degrees, fall rain events, and winter freeze-thaw cycles if you delay permanent work. Each weather season that passes degrades temporary repairs and increases the risk of secondary damage.
Get multiple estimates from established local contractors and resist pressure to hire the first company that can start immediately. Storm-chasing contractors frequently descend on Northern Virginia after severe weather events, knocking on doors and offering emergency repairs at inflated prices with substandard materials and no local accountability. Verify Virginia contractor licensing, current liability and workers compensation insurance, local references you can verify, and Better Business Bureau ratings before signing any contracts.
Understanding whether your situation requires targeted spot repairs or complete roof replacement helps you plan and budget appropriately. Our comprehensive roof leak repair guide walks through the diagnostic process and decision framework for determining the right scope of permanent work. For older roofs showing multiple problem areas across the surface, investing in proper roof replacement often costs less over a ten-year horizon than repeated emergency and spot repairs that never fully resolve underlying system failures.
When to Call Professional Emergency Roofing Services
Some emergency roof situations exceed safe DIY capabilities and require immediate professional intervention regardless of weather conditions or time of day. Call a professional emergency roofer when you observe structural damage visible in the attic such as cracked or sagging rafters, multiple simultaneous active leaks in different parts of the home, large sections of missing shingles exposing bare decking, damage to critical flashing systems around chimneys and plumbing vents, or any situation involving electrical hazards from water contacting wiring or fixtures.
Commercial buildings, multi-story homes, properties with steep or complex roof configurations, and any structure where interior water is contacting electrical panels, HVAC equipment, or fire suppression systems demand professional emergency response. The liability and safety risks of improper amateur emergency repairs on these structures far exceed the cost of professional emergency service calls, which typically range from $300 to $1,500 in Northern Virginia depending on the scope and timing of the response.
Many established Northern Virginia roofing contractors including Reston Roofing offer emergency response services for severe situations. Properties throughout Reston, Herndon, Sterling, Fairfax, and surrounding communities can access same-day emergency response when substantial property damage is imminent. This investment in professional emergency service protects both your property and your safety during the most stressful roofing scenarios a homeowner can face.
Insurance Claims for Emergency Roof Damage in Northern Virginia
Most homeowner insurance policies in Northern Virginia cover emergency roof damage caused by storms, fallen trees, hail, and wind events. Understanding the claims process before an emergency strikes helps you respond effectively and maximize your coverage when damage occurs. Your policy likely covers both the emergency mitigation costs such as tarping and water extraction and the permanent repairs needed to restore your roof to pre-damage condition.
File your claim within 48 hours of discovering damage. Provide your insurance company with the photos and videos you documented during your emergency response, a written description of the damage and its cause, receipts for any emergency materials you purchased, and the name and contact information of the roofing contractor you have engaged for permanent repairs. Professional roofers experienced with insurance claims can provide detailed damage assessments, supplement documentation, and scope-of-work proposals that insurance adjusters require for claim approval.
Do not sign any contracts with storm-chasing contractors who offer to handle your insurance claim in exchange for the work. This practice, while common across Northern Virginia after major storms, often results in inflated claims, substandard repairs, and potential insurance fraud charges. Work with an established local roof repair contractor who will coordinate with your insurance adjuster transparently and perform quality permanent repairs that protect your home for decades.
Frequently Asked Questions
What is the fastest way to stop a roof leak during a storm?
The fastest way to stop a roof leak during an active storm is to manage water from inside your home. Place buckets under drip points, move valuables away from the leak path, and if you have attic access, slide a heavy plastic tarp between the roof decking and insulation above the leak point. Never climb onto a wet roof during active rain or wind. Interior water management buys time until conditions allow safe exterior repairs or professional emergency response.
How much does emergency roof leak repair cost in Northern Virginia?
Emergency roof leak repair in Northern Virginia costs between $300 and $1,500 for temporary stabilization depending on severity and accessibility. After-hours emergency calls typically add $150 to $300 to the base repair cost. Permanent repairs following emergency stabilization range from $500 to $3,000 for localized damage. Full roof replacement if damage is extensive ranges from $8,000 to $25,000 or more depending on roof size and material type.
Can I use roof cement to temporarily fix a leak?
Yes, roof cement works as a temporary fix for small cracks, lifted shingles, and minor flashing gaps when applied to clean, completely dry surfaces. It will not adhere to wet surfaces and rain will wash uncured cement away. Apply a generous layer extending several inches beyond visible damage in all directions. Roof cement patches typically last weeks to months depending on weather exposure and should be replaced with permanent repairs as soon as conditions and scheduling allow.
How long can a temporary roof repair last?
A properly installed emergency tarp can protect your roof for two to four weeks under normal weather conditions. Roof cement patches typically last one to six months. Emergency membrane patches on flat roofs can last several months to a year if applied correctly. However, all temporary repairs degrade over time and should be replaced with permanent solutions within 30 days whenever possible to prevent secondary water damage from trapped moisture, mold growth, and structural deterioration.
Should I file an insurance claim for emergency roof leak damage?
File an insurance claim if the leak resulted from a covered event such as storm damage, fallen trees, or hail. Document all damage with photos and videos before making temporary repairs. Most homeowner policies cover emergency mitigation costs including tarping and water extraction. Contact your insurance company within 48 hours of discovering damage. A professional roofer can provide documentation and damage assessments that support your claim and help maximize your coverage for both emergency and permanent repairs.
Get Emergency Roof Leak Help in Northern Virginia
Reston Roofing provides fast emergency response and permanent roof leak solutions for all roof types throughout Northern Virginia. Our experienced team stabilizes active leaks safely, identifies the root cause of water entry, and delivers permanent repairs that prevent recurrence. We work with your insurance company to document damage properly and ensure you receive the coverage you are entitled to under your policy.
We serve homeowners and commercial property managers across Reston, Herndon, Sterling, Fairfax, Oakton, Vienna, and all surrounding Northern Virginia communities. Call us at (571) 453-6515 for emergency roof leak response or schedule a consultation for planned repairs. Protecting your home starts with the right response to the first sign of a leak.