Standing Seam Metal Roof Installation: Complete Homeowner Guide
Standing seam metal roof installation is a precision process that transforms your home's protection and appearance for 40 to 70 years. Unlike asphalt shingles that most experienced roofers can install competently, standing seam systems demand specialized knowledge, purpose-built equipment, and installers who understand the specific engineering behind concealed-fastener metal roofing. The panels must be measured to exact dimensions, cut to precise lengths, aligned perfectly across the roof plane, and mechanically seamed together using equipment that most general roofing contractors do not own and have never operated.
For Northern Virginia homeowners considering standing seam metal roofing for their homes in Reston, Herndon, Fairfax, Great Falls, or anywhere across the NOVA region, understanding the installation process serves two important purposes. First, it helps you recognize quality workmanship during and after the project so you can hold your contractor accountable for the details that determine whether your roof performs for 50 years or develops problems within the first decade. Second, it gives you realistic expectations about timeline, disruption, and the preparation steps that need to happen before a single panel goes on the roof.
This guide walks through every phase of standing seam metal roof installation from initial preparation and measurement through panel installation, seaming, trim work, and final inspection. We cover the cost factors specific to the Northern Virginia market, the timeline you should expect for different roof configurations, and the quality indicators that separate professional installations from amateur work that costs the same but delivers a fraction of the performance.
What Makes Standing Seam Installation Different
Standing seam metal roofing uses concealed fasteners and interlocking vertical panels that create raised seams sitting above the roof's drainage plane. This design delivers the superior weather resistance that makes standing seam the premium residential metal roofing choice, but it also makes the installation process fundamentally different from laying asphalt shingles or even installing exposed-fastener metal panels. Every element of the system must work together precisely, and errors that would be minor inconveniences on a shingle roof become serious performance problems on a standing seam system.
The concealed fastener mechanism requires panels to attach to the roof deck through hidden clips rather than screws driven through the panel surface. These clips grip the panel edge and allow the metal to expand and contract with temperature changes without buckling, distorting, or pulling fasteners through the panel surface. Clip spacing must follow manufacturer specifications exactly. Too few clips leave panels vulnerable to wind uplift during the 60 to 80 mph gusts that regularly hit homes along the Route 28 corridor in Sterling, Chantilly, and Herndon. Too many clips restrict thermal movement, causing the panel to buckle and oil-can between attachment points. This precision requirement explains why choosing experienced metal roofing contractors matters far more for standing seam than for any other residential roofing material.
Pre-Installation Preparation and Deck Inspection
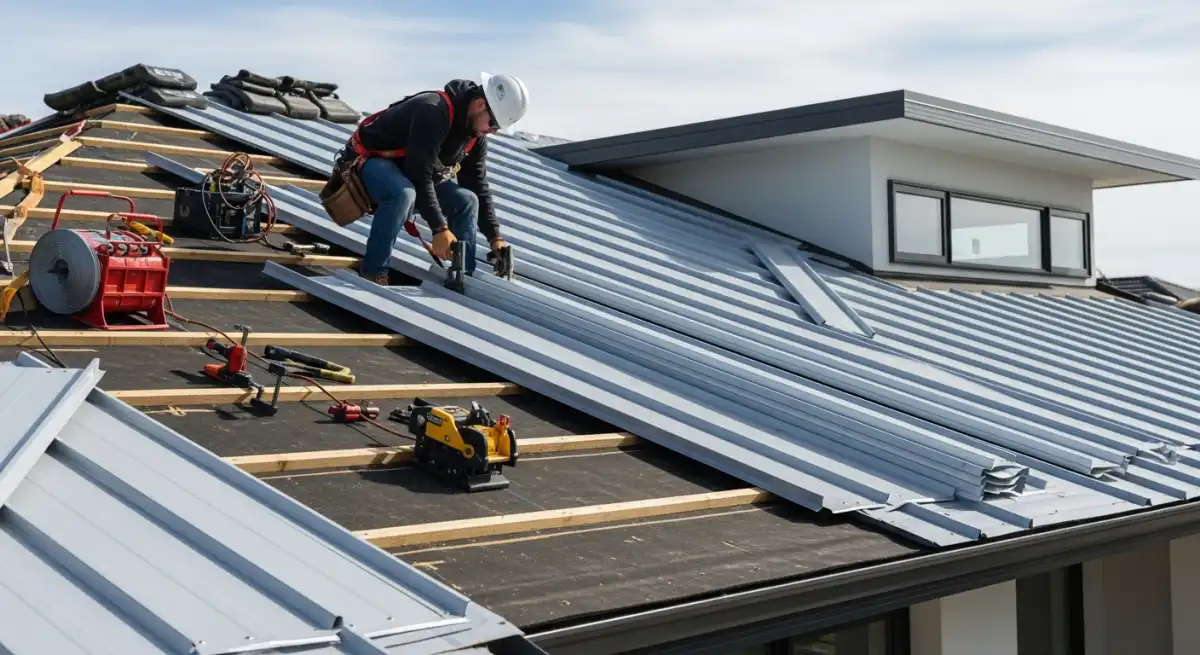
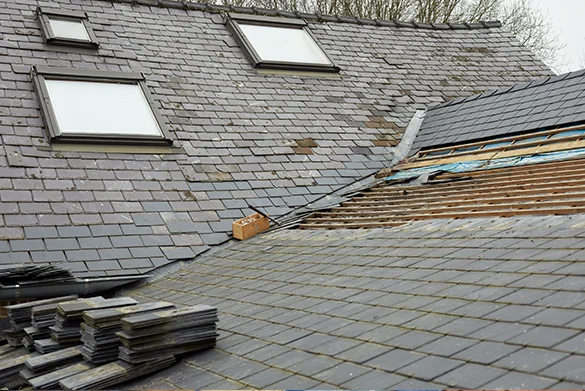
Successful standing seam installation begins well before panels arrive on site. The first critical step is a thorough inspection of the existing roof deck once the old roofing material has been removed. Standing seam panels require a solid, smooth, and structurally sound decking surface, typically three-quarter-inch plywood or seven-sixteenths-inch OSB in good condition. Any sections that show rot, water damage, delamination, or sagging must be cut out and replaced with new sheathing before installation can proceed.
Northern Virginia homes built in the 1970s and 1980s across neighborhoods in Vienna, Oakton, Falls Church, and the older sections of Reston frequently have deck damage from decades of minor leaks that went undetected or were patched rather than properly repaired. The tear-off process often reveals soft spots, stained areas, and deteriorated sections that were invisible beneath the old shingles. Budget 10 to 20 percent above the base installation estimate for potential deck repairs, because discovering damaged decking is the norm rather than the exception on homes older than 25 years.
After deck repairs, the underlayment goes down. Quality standing seam installations in Northern Virginia use synthetic underlayment rated specifically for metal roof applications rather than traditional felt paper. Synthetic underlayment lays flatter, resists tearing during the installation process, handles moisture better, and provides a superior secondary water barrier beneath the metal panels. Ice and water shield membrane is installed along eaves extending at least 24 inches past the interior wall line per Virginia building code, in all valleys, around chimneys and skylights, and at every roof-to-wall transition. This belt-and-suspenders approach to waterproofing is essential because standing seam panels are expected to perform for decades, and the underlayment must match that longevity. Similar preparation standards apply to all major roof replacement projects in the NOVA region.
Measuring, Ordering, and Panel Fabrication
Precise measurements are the foundation of a standing seam installation that looks right and performs correctly. Standing seam panels typically run continuous from ridge to eave on each roof plane, which eliminates horizontal seams that create potential leak points. Professional installers measure every roof plane individually, accounting for exact eave-to-ridge distances, overhang dimensions at the eaves and rakes, and the specific angles at hips, valleys, and ridge transitions. Even a quarter-inch measurement error on a single panel multiplies across the full width of the roof, creating cumulative alignment problems that are impossible to fix once seaming begins.
Panel fabrication lead time ranges from 1 to 4 weeks depending on the supplier, the panel profile selected, and the season. Standard Galvalume finishes typically ship faster than custom painted colors. Some contractors operate portable roll-forming machines that fabricate panels on site from coil stock, which eliminates transportation damage risks and allows panels to be cut to exact length as they are installed. Other contractors order pre-cut panels from regional fabrication facilities that ship to the job site on flatbed trucks.
Regardless of fabrication method, panel handling requires care that shingle materials do not demand. Scratched or dented panels cannot be repaired. They must be discarded and reordered, which adds cost and delays the project. Professional crews use padded carriers, protective felt interleaving between stacked panels, and careful lifting techniques to prevent damage during unloading and staging. Understanding these requirements helps explain why standing seam roofing costs more than simpler roofing systems where materials can be trimmed, adjusted, and handled roughly without consequence.
Installation Step by Step
Step 1: Eave Trim and Starter Components
Installation begins at the roof eaves with starter strips and eave trim that create clean finished edges and provide secure attachment points for the first panel course. These initial components must be installed perfectly straight and level because any deviation in the starter assembly telegraphs through every subsequent panel on that roof plane. Installers use chalk lines, string lines, and laser levels to verify alignment before driving a single fastener.
Eave trim, also called drip edge flashing, directs water away from fascia boards and into the gutter system. Quality installations use eave trim fabricated from the same gauge and finish as the roof panels for consistent appearance and corrosion resistance. The trim integrates with the underlayment using proper overlap sequences that maintain water-shedding integrity at every layer transition. Corners and transitions where two trim pieces meet require custom-cut sections that fit precisely without gaps or misaligned joints that could allow water penetration.
Step 2: Clip Installation and First Panel Placement
Fixed and floating clips attach to the roof deck at intervals specified by the panel manufacturer, typically 12 to 16 inches on center. The clip spacing calculation accounts for the specific panel profile, local wind load requirements based on Northern Virginia building codes, the roof's exposure category, and the distance from the roof edge where wind uplift forces are highest. A fixed clip at the eave anchors the panel against gravity loads, while floating clips across the field allow the panel to expand and contract along its length as temperatures cycle between winter lows in the teens and summer highs above 95 degrees.
The first panel sets the alignment reference for the entire roof plane. Installers position it carefully, checking square to the eave and rake edges and confirming proper overhang dimensions at both the eave and the gable end. Once confirmed, they engage the panel's female leg over the fixed clips and loosely fasten the male leg to allow adjustment during the seaming process. Getting this first panel right is the most important single step in the entire installation, because every subsequent panel references its position.
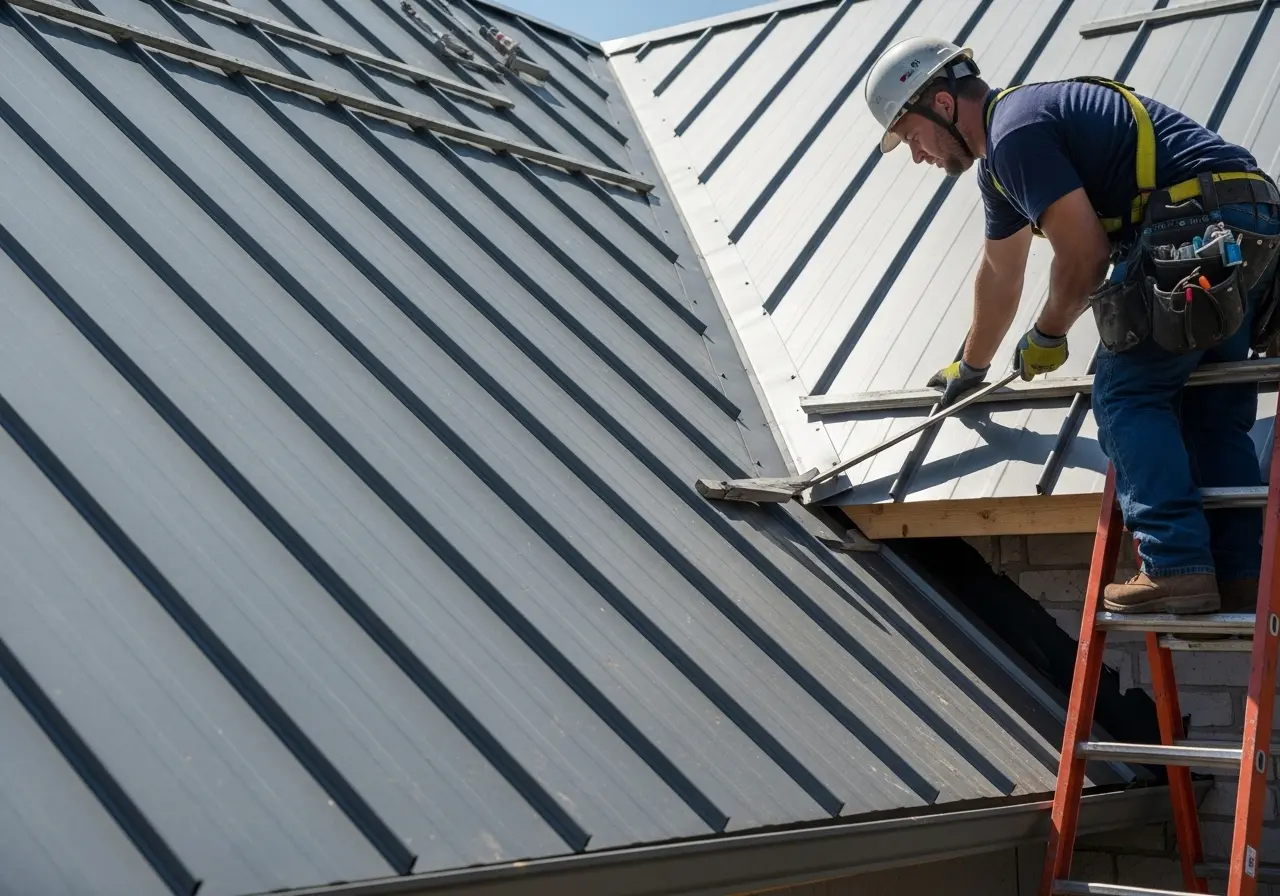
Step 3: Panel Installation and Mechanical Seaming
Subsequent panels install in sequence across the roof plane, with each panel's female leg engaging over the previous panel's male leg and the clips beneath. Mechanical seaming joins the panels together by folding the interlocking legs into a raised watertight seam using either hand seamers or motorized seaming tools. Double-lock seams, which fold the metal twice, provide superior wind and water resistance compared to single-lock seams and are the standard for residential installations in Northern Virginia where severe weather is a regular occurrence.
Proper seaming requires consistent pressure and travel speed across the full length of every seam. Insufficient seaming pressure creates loose joints that can leak during wind-driven rain or separate under wind uplift loads. Excessive pressure distorts the panel profile, damages the protective paint finish, and creates stress points that can develop micro-cracks over years of thermal cycling. Motorized seaming tools deliver better consistency than hand seamers, but they require experienced operators who understand proper tool settings and can recognize the difference between a quality seam and one that will cause problems later.
Valley, Ridge, and Penetration Details
Valleys, ridges, and roof penetrations are where standing seam installation quality is most visible and where shortcuts create the majority of post-installation problems. Valley installations use either open valley systems with dedicated valley flashing beneath the panel ends or closed valley systems where panels are trimmed and sealed to follow the valley line. Both approaches require precise cutting, proper clearance dimensions for water flow, and watertight sealing at every transition point.
Ridge caps complete the roof peak with ventilated or solid closure systems. Ventilated ridge caps incorporate airflow channels that allow hot attic air to exhaust through the ridge, improving energy efficiency and extending the life of both the roof system and the attic insulation below. The ridge cap profile must match the standing seam panel profile and seam height while providing weathertight closure. Professional installers fasten ridge caps through clips rather than driving screws through the panel face, maintaining the concealed fastener advantage that defines the standing seam system.
Penetration flashing around vent pipes, chimneys, skylights, and HVAC curbs demands custom fabrication and careful integration with the standing seam panels. Pipe flashings use neoprene boots with metal bases that slide under the upslope panel and over the downslope panel, creating a shingling effect that sheds water away from the penetration. Chimney flashing follows step-and-counter-flashing principles adapted for the standing seam profile. Rushed or sloppy work on penetration details is the single most common cause of leaks on standing seam roofs, which is why quality contractors budget adequate time for these critical elements rather than rushing through them at the end of the project.
Installation Timeline and What to Expect
Standing seam installation typically takes 3 to 7 working days for an average residential roof in Northern Virginia, though the total project calendar can stretch longer due to weather delays, material lead times, and the coordination required for complex roof geometries. Simple gable roofs with few penetrations install at the faster end of that range. Complex hip roofs with multiple valleys, dormers, skylights, and chimney transitions take longer because each transition requires custom fabrication and careful integration with adjacent panels.
The general timeline breaks down approximately as follows: 1 day for existing roof tear-off and deck inspection, 1 day for deck repairs and underlayment installation, 2 to 4 days for panel installation and seaming across all roof planes, and 1 day for trim work, penetration flashing, cleanup, and final inspection. Weather delays are more impactful on metal roofing than shingle work because wind speeds above 15 mph make handling large metal panels unsafe, and any rain stops work completely to protect open decking and underlayment from moisture.
Installation Cost Factors in Northern Virginia
Standing seam installation costs in the Northern Virginia market are influenced by several factors beyond basic roof size. Understanding these variables helps you evaluate contractor proposals and compare estimates on an apples-to-apples basis.
| Cost Factor | Impact on Price | Typical Range (NOVA 2026) |
|---|---|---|
| Panel Gauge (24 vs 26) | 24-gauge costs 15-25% more | $1.50 - $3.00/sq ft difference |
| Finish Type (Galvalume vs Kynar) | Kynar painted finish adds 20-35% | $2.00 - $4.00/sq ft difference |
| Roof Complexity (Simple vs Complex) | Each valley, hip, dormer adds labor | $500 - $1,500 per transition |
| Deck Repair | Varies by extent of damage | $50 - $100 per sheet replaced |
| Structural Reinforcement | Rarely needed but significant if required | $3,000 - $8,000 |
| Chimney/Skylight Flashing | Custom fabrication per penetration | $400 - $1,200 each |
| Steep Pitch Premium (8:12+) | Safety equipment and slower pace | 10 - 25% surcharge |
Total installed costs for standing seam metal roofing in Northern Virginia range from $18,000 to $32,000 for a typical home. Quality installers with proper equipment and experience command higher prices than general roofers attempting metal work, but the performance difference over 50 years more than justifies the premium. Get detailed estimates from at least three qualified metal roofing contractors to understand fair market pricing for your specific roof.
Quality Indicators to Watch During Installation
As a homeowner, you should monitor several quality indicators throughout the installation process. Straight, uniform seams running from eave to ridge without wavering indicate proper panel alignment and seaming technique. Panels should lie flat without visible buckling, oil-canning, or distortion between seams. All fasteners should be completely concealed beneath the panel surface with no exposed screw heads visible anywhere on the roof field. Clip spacing should be consistent and match the manufacturer's specification sheet that your contractor should provide upon request.
Professional crews protect finished panels throughout the installation process, using padded tools and careful handling to prevent scratches or dents in completed sections. They maintain clean work sites, removing debris and fastener waste daily rather than letting it accumulate. Quality contractors perform self-inspections at each stage, checking alignment, seam integrity, and flashing details before moving to the next roof section rather than rushing through the entire installation and hoping everything came together correctly at the end.
Common Installation Mistakes and How to Avoid Them
Several installation errors compromise standing seam roof performance and are worth understanding so you can identify them during or after your project. Insufficient or improperly spaced clip installation is among the most common problems. When clips are too far apart, panels are vulnerable to wind uplift that can peel seams open during severe storms. When clips are too close together or fastened too tightly, panels cannot expand and contract freely, causing buckling and distortion that worsens with every temperature cycle.
Skipping or improperly installing underlayment creates moisture problems that may not become apparent for years. Using the wrong underlayment product, such as organic felt instead of synthetic material rated for metal applications, can cause premature degradation from the heat generated by the metal panels above. Overtightening screws in clips and trim restricts panel movement and creates stress concentrations that lead to fatigue cracking over time.
Inadequate penetration flashing is responsible for the majority of standing seam roof leaks. Contractors who rush through chimney, skylight, and vent pipe details to finish the job faster create problems that appear months or years later as sealants fail and flashing joints separate. Using exposed fasteners in locations where concealed attachment is possible voids warranties and creates future leak points. These mistakes underscore why contractor selection based on specific standing seam experience matters more than brand name recognition or the lowest price on the estimate. Quality roof repair and installation contractors invest the time to get these details right the first time.
Post-Installation Inspection and Warranty Documentation
A thorough final inspection before releasing final payment protects your investment and establishes a documented baseline for warranty purposes. Walk the property with your contractor and visually inspect all seams from the ground for straightness and uniformity. If safe access allows, examine seam engagement up close to verify complete mechanical connection with no gaps or loose sections. Check every trim piece for tight fit and proper sealant application. Inspect all penetration flashings for complete water-shedding details with no gaps, lifted edges, or missing sealant.
Documentation is essential for long-term warranty protection. Obtain copies of the manufacturer's panel warranty, the paint finish warranty, and the installer's workmanship warranty. Verify that warranty registration has been completed within the manufacturer's required timeframe, which is typically 30 to 60 days after installation. Keep the original estimate, the signed contract, all change orders, the final invoice, and a complete set of installation photos in a permanent file. This documentation package proves invaluable if you file a warranty claim years later or if you sell the home and need to transfer warranty coverage to the buyer.
Frequently Asked Questions
How long does standing seam metal roof installation take?
Standing seam metal roof installation typically takes 3 to 7 days for an average residential roof in Northern Virginia. Simple gable roofs install faster in 3 to 4 days. Complex hip roofs with multiple valleys, dormers, and penetrations take 5 to 7 days. Weather delays from rain or high winds can extend the timeline. Budget an additional 1 to 4 weeks of lead time for custom panel fabrication before installation begins on site.
How much does standing seam metal roof installation cost in Northern Virginia?
Standing seam metal roof installation in Northern Virginia costs between $18,000 and $32,000 for a typical home with 2,000 to 2,500 square feet of roof area. The price includes tear-off, deck inspection and repair, synthetic underlayment, ice and water shield, panels, trim, flashing, and cleanup. Costs vary based on panel gauge, finish selection, roof complexity, and whether structural reinforcement is needed. Northern Virginia pricing runs 15 to 25 percent above national averages.
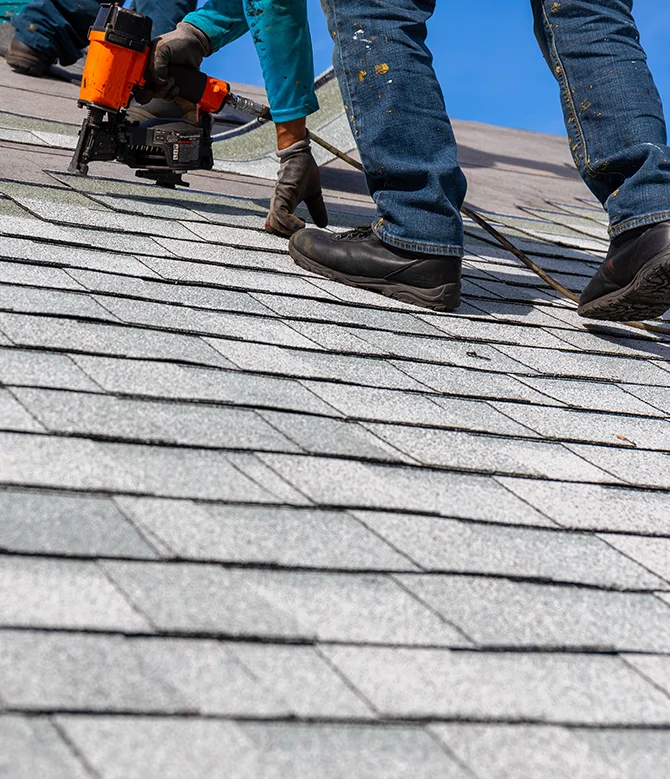
Can standing seam metal roofing be installed over existing shingles?
While it is technically possible to install standing seam panels over existing shingles using furring strips, most professional contractors in Northern Virginia recommend full tear-off for best results. Installing over old shingles prevents proper inspection of the roof deck for rot or damage, can create an uneven surface that shows through the metal panels, and may void the panel manufacturer's warranty. Full tear-off adds cost but ensures a quality foundation that supports the roof's 50-plus year expected lifespan.
What is the difference between snap-lock and mechanically seamed standing seam panels?
Snap-lock panels click together by hand without requiring seaming equipment. They install faster and cost less but are limited to roof pitches of 3:12 or steeper. Mechanically seamed panels use a portable seaming machine to fold the panel legs together in a single-lock or double-lock configuration. Mechanical seams provide superior wind and water resistance and can be used on lower roof pitches down to 1:12 or even 0.5:12 with double-lock seaming. Most quality residential installations in Northern Virginia use mechanically seamed double-lock panels for maximum weather protection.
How do I choose the right contractor for standing seam installation?
Look for contractors with specific standing seam metal roofing experience rather than general roofing background. Request photos of completed standing seam projects and contact at least three references. Verify proper Virginia contractor licensing, liability insurance, and workers compensation coverage. Ask about manufacturer certifications for the specific panel system being proposed. Get detailed written estimates that specify panel gauge, finish, clip type, underlayment, and warranty terms. Avoid the lowest bidder if their price is significantly below other qualified contractors, as this often indicates shortcuts in materials or installation quality.
Choose Reston Roofing for Expert Standing Seam Installation
Standing seam metal roof installation demands specialized expertise that separates professional results from amateur work that looks similar on day one but fails to deliver the 50-year performance that standing seam is engineered to provide. Every detail matters, from clip spacing and seam quality to penetration flashing and trim fabrication. Cutting corners on any element compromises the entire system.
Reston Roofing's metal roofing team has installed standing seam systems on homes throughout Reston, Herndon, Sterling, Fairfax, Great Falls, and communities across Northern Virginia. Our crews operate professional-grade seaming equipment, follow manufacturer installation specifications precisely, and take the time to execute every penetration detail and trim transition correctly the first time. We provide detailed written estimates, realistic timelines, and comprehensive warranty coverage that protects your investment for decades.
Call us today at (571) 453-6515 or schedule a consultation online. We will inspect your roof, discuss panel options and finish selections, and provide a detailed proposal for a standing seam installation that delivers the quality and longevity your home deserves.